Turn your project to-do list into an interactive checklist
Kantree’s checklist mode is here! This long-awaited feature for project management was introduced along with reordering sub-cards, a custom calendar, and other handy tweaks.
[take a look at the release notes if you haven’t already]
What’s great about the interactive checklist?
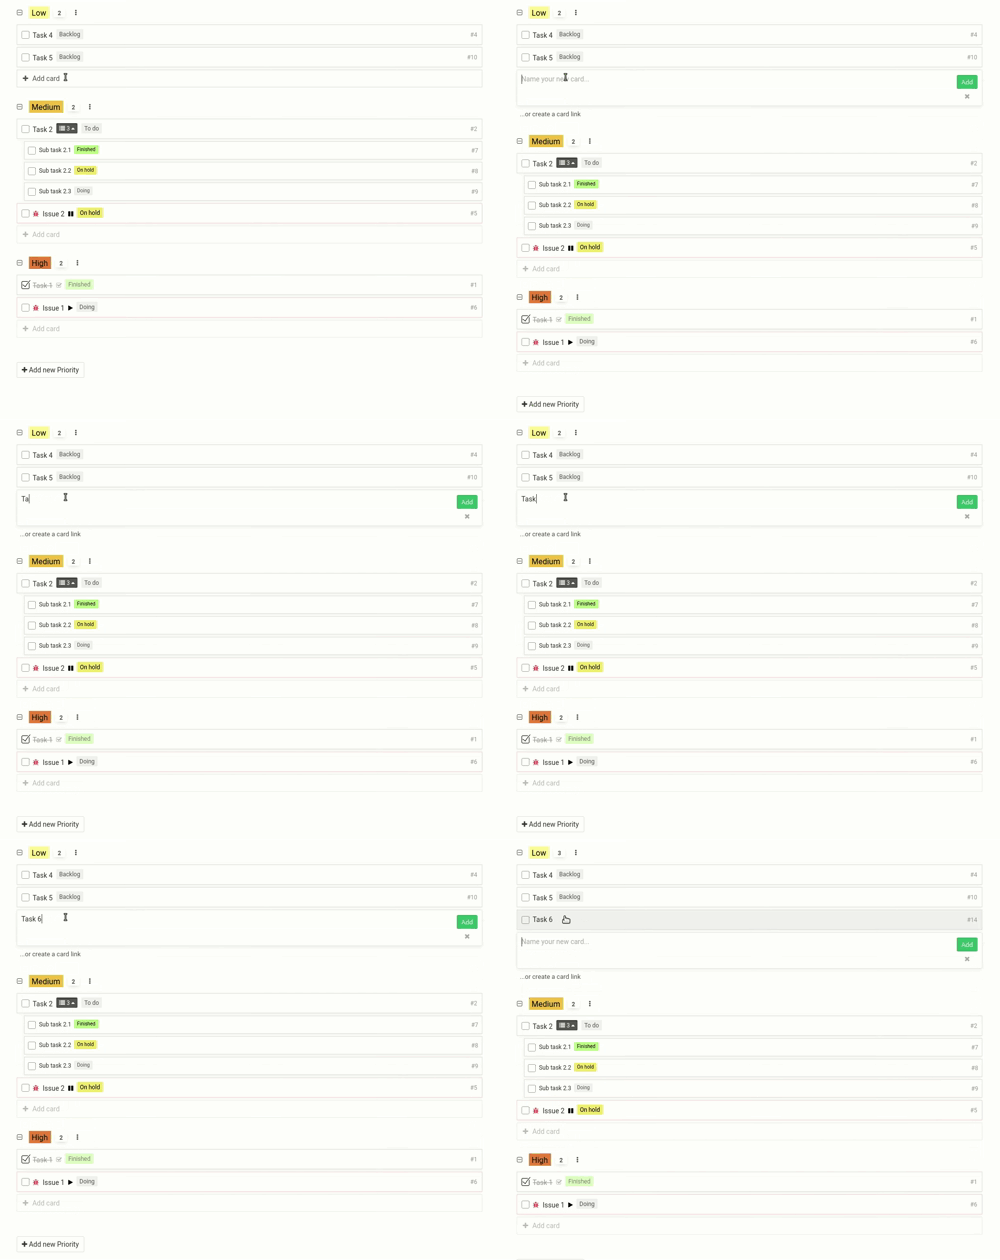
This workspace view lets you see all your cards and sub-cards in a single list, track progress, and check off finished tasks.
It’s like a paper project to-do list, but better.
 Kantree’s interactive project to-do list displays all your project cards and sub-cards in a single list. You can manage it by adding new cards and checking off completed tasks.
In addition to the other workspace views in Kantree that you already use, such as the kanban board and spreadsheet-like table, the checklist is another great tool for task card management.
It’s designed to help you organize your workload and, in turn, avoid feeling overwhelmed at work. This is especially true now that the hybrid-remote workplace is more common and here to stay post-pandemic, according to business analysts.
How to use the checklist feature?
Here are a few tips and guidelines for using our project management to-do list:
- Use it to stay productive and on top of your tasks. With the checklist view, you can easily create your daily, weekly, or monthly to-do lists.
- It’s also ideal when you need to break down a complex project into a series of manageable tasks and track its progress.
-
The checklist mode also works well for deadline-driven projects, such as organizing an event or onboarding a new employee.
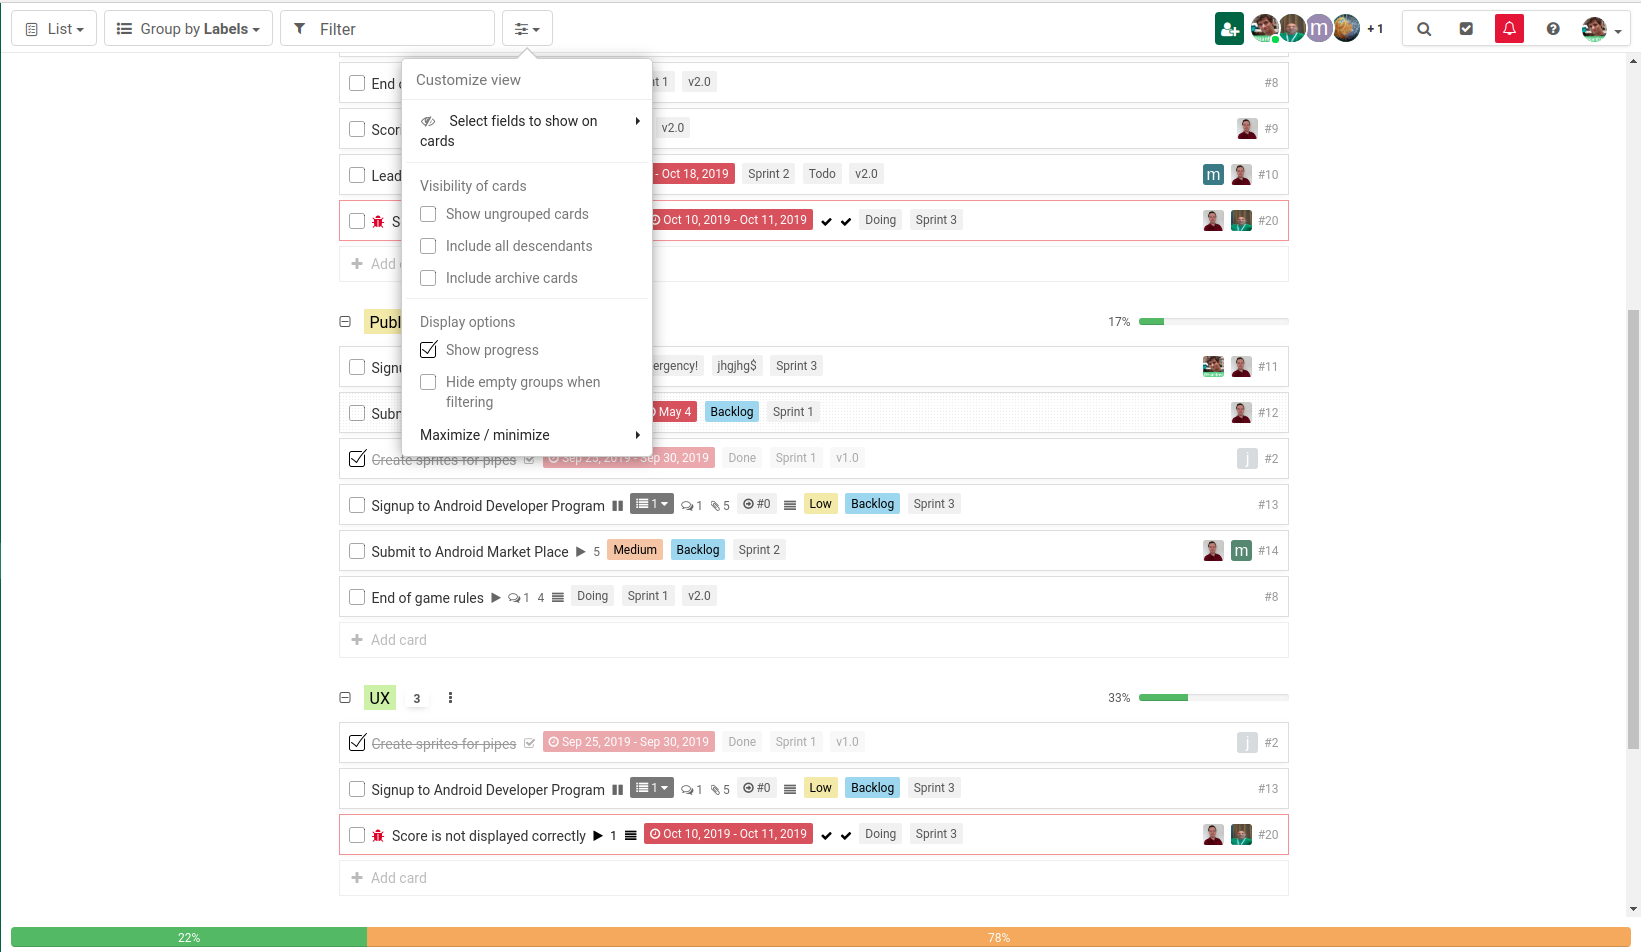
Tip: If you use the “show progress” option, progress bars will be shown at the bottom of the screen and on each section.
 The checklist view comes with a progress bar. It can be displayed at the bottom of the screen or after each section.
 - The view comes with boxes that you can quickly check off when a task is complete (feels good, doesn’t it?). When you switch to the kanban view, you will see that card in the “done” column, or however you decide to name it.
-
Because the checklist mode consists of unlimited cards and sub-cards, you can add due dates and assignees, set reminders, upload files from your computer or integrated services, and add any details that you need. As usual, everything is customizable in Kantree. Your paper list can’t do that!
Tip: If you have daily, weekly or monthly tasks, set up recurring cards and they will show in the checklist view. No need to recreate them manually.
[See also: Workflow automation gets an upgrade]
- You can group your tasks according to several criteria, such as type of work, month, assignee (including tasks assigned to yourself). When done, save the checklist as a private view for quick access next time you’re using Kantree.
-
The checklist works great as an interactive meeting agenda. Send a link to your team and save time by updating information right in the cards: due dates, assignees, etc. All changes will be visible in real time and everyone will end up with a clear idea of the workload, no need for recap emails.
Tip: When you’re meeting with a client or working with an external agency, you can share checklists with them too. Learn about managing permissions.
[See also: Wasting time in meetings? Use Kantree instead]
To go further
3 possibilities offered to you if you have an interest with this subject :
-
1
Try Kantree here, it is free and you don’t need any credit card
-
2
If you want to learn more about how Kantree can adapt to your challenges, make an appointment with an expert on your use case.
-
3
Are you willing to join +1500 professionals receiving our advices and news on digitalization, collaboration, productivity? Register to our newsletter here.
If you enjoyed this article, share it easily down here.