Welcome to Kantree !
This guide will help you to get started by exploring the key concepts of the app.
Introduction - What is Kantree?
- Kantree allows you to create personal or collaborative projects. You control the information you want to show or see thanks to Views.
- Kantree can address many use cases. The project structure can be created from a Template or from scratch.
- Kantree allows you to create Forms whose information will directly feed your projects.
- Kantree allows you to translate your Workflows into Automations to reduce manual actions.
- Kantree allows youto create reports thanks to Dashboards to manage your indicators.
- Kantree centralizes the movements on your projects and the tasks to be accomplished in My Work, your personal project hub.
To log in
Connect to: https://kantree.io
Connection methods
- Google account / Apple / Microsoft
- SSO (set up by your company)
To use Kantree on mobile and tablet
👉 We recommend that you enable a two-factor authentication.
Kantree offers integrations with your everyday tools such as Slack and Teams. See our guide for Third-party integrations
Language preferences
🇬🇧 🇫🇷 🇩🇪 🇪🇸 🇮🇹 🇵🇹
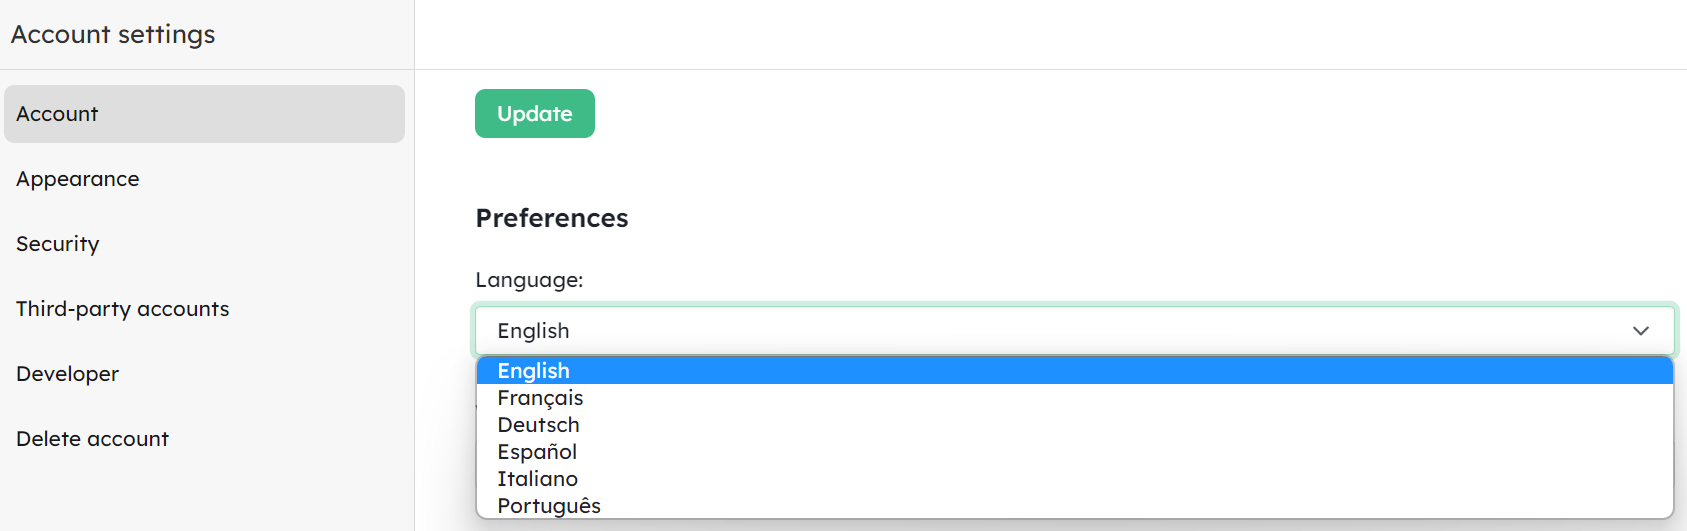
Kantree is currently available in six languages: English, French, German, Spanish, Italian and Portuguese. If you work in a multilingual environment, let your teammates know so they can manage their projects in the language of their choice.
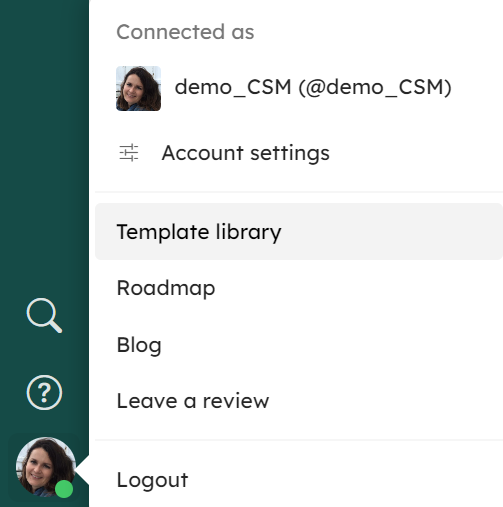
To set the language parameter, once connected, go to the section dedicated to your account settings by clicking on the circle or the avatar at the bottom left of your screen then ”Account settings” then “Language preferences”.
The organization
Home page
An organization is the entity that contains teams and workspaces. To allow companies to fully translate their internal organization and processes into Kantree, it is possible to create several organizations (feature available depending on your subscription level)
This home page allows you to view all your teams and workspaces in one place. If you have an Owner or Admin role at the organization level, you can create a new team by clicking on “Add team”.
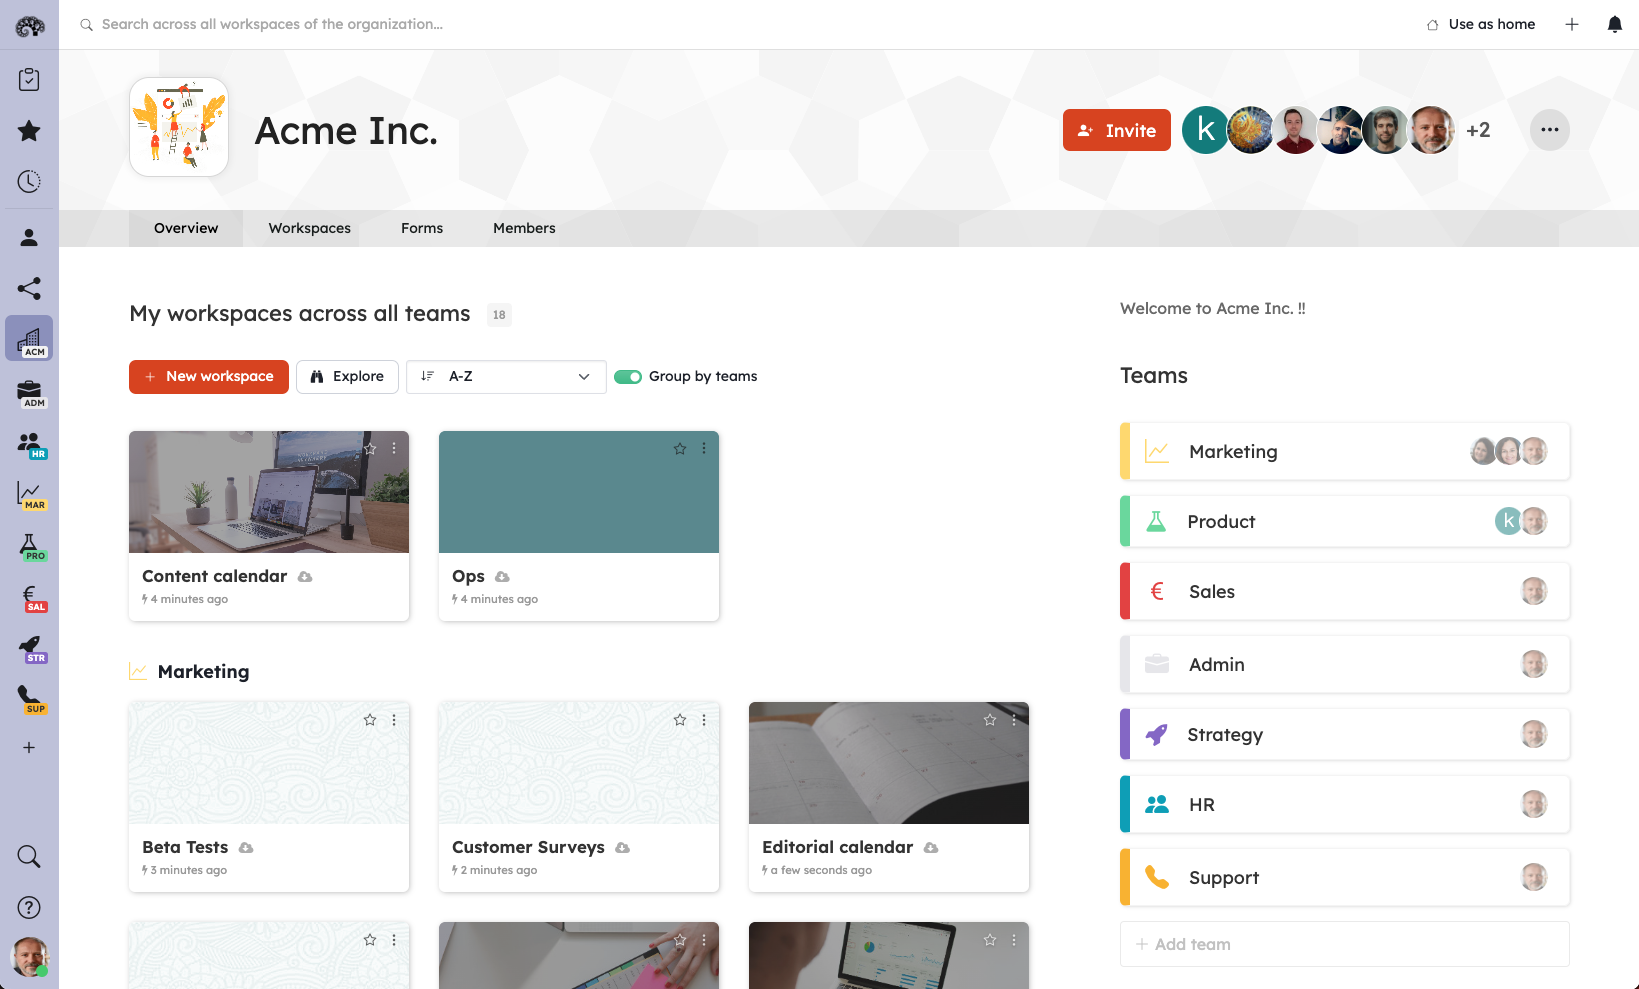
With teams, you can easily organize your workspaces and make them clearly identifiable by users. For example, you can create groups of members of cross-functional departments to work on common projects.
The workspace
Presentation
There are 5 different areas on the screen:

- The main area is dedicated to the content of your project
Depending on the viewing mode selected (Kanban, Timeline, Journal or Reports), you will see your cards and groups differently. - The cards
At the foundation of every project, you will find cards. Cards are the easiest objects to handle in a project and usually represent your work and ideas: anything that can be done, like a phone call or a bug to be fixed, or that needs to be kept, like the minutes of a meeting or an important business contact. You can create as many cards as you want. The cards are fully configurable and adaptable to your needs (more info in our customization guide). - Top bar
This is the View, Filter, and Search tools corner. You can change the viewing mode, group data, sort it, filter it to create personalized views. - Workspace sidebar
Here you will find access to everything related to your project: settings, automations, integrations as well as shared and private views. - Persistent app sidebar
- 1st section: you will find your personal project hub “My work”, your favorite projects, recently opened projects.
- 2nd section: you will find your personal workspaces, the organizations to which you have access.
- 3rd section: you will find a multi-workspace search tool, a shortcut to our help center and your account settings.
Create a project
👉 Before embarking on the creation of your workspace, think about what should be included in it and ask yourself about the structure of your project in a single large workspace or in several workspaces.
For reasons of readability, we recommend that you create several workspaces which can then be linked to each other using card relationships. See our guide on the [card relationship field](/help/guides/organize-a-project#field-card-relationship)
Choose the location and visibility of your workspace
- Position yourself in the team where you want your workspace to appear and click on
New workspace.
- You can also create a workspace from the Organization home page where you will find the same button. You can decide to change the location afterwards by going to the workspace settings.
Choose the base of your project
- Choose a type of workspace that most closely matches your use case from the “Template library“. You can use it as a fully modifiable base.
It is possible to make templates available to your organization. In this case, these will be available in “Templates from your organization”.
- If you prefer to build everything from scratch, select “Empty”.
Choose settings
- Choose the workspace name. You can edit it at your convenience
- Choose the visibility. It can also be changed at any time
- Click on
create
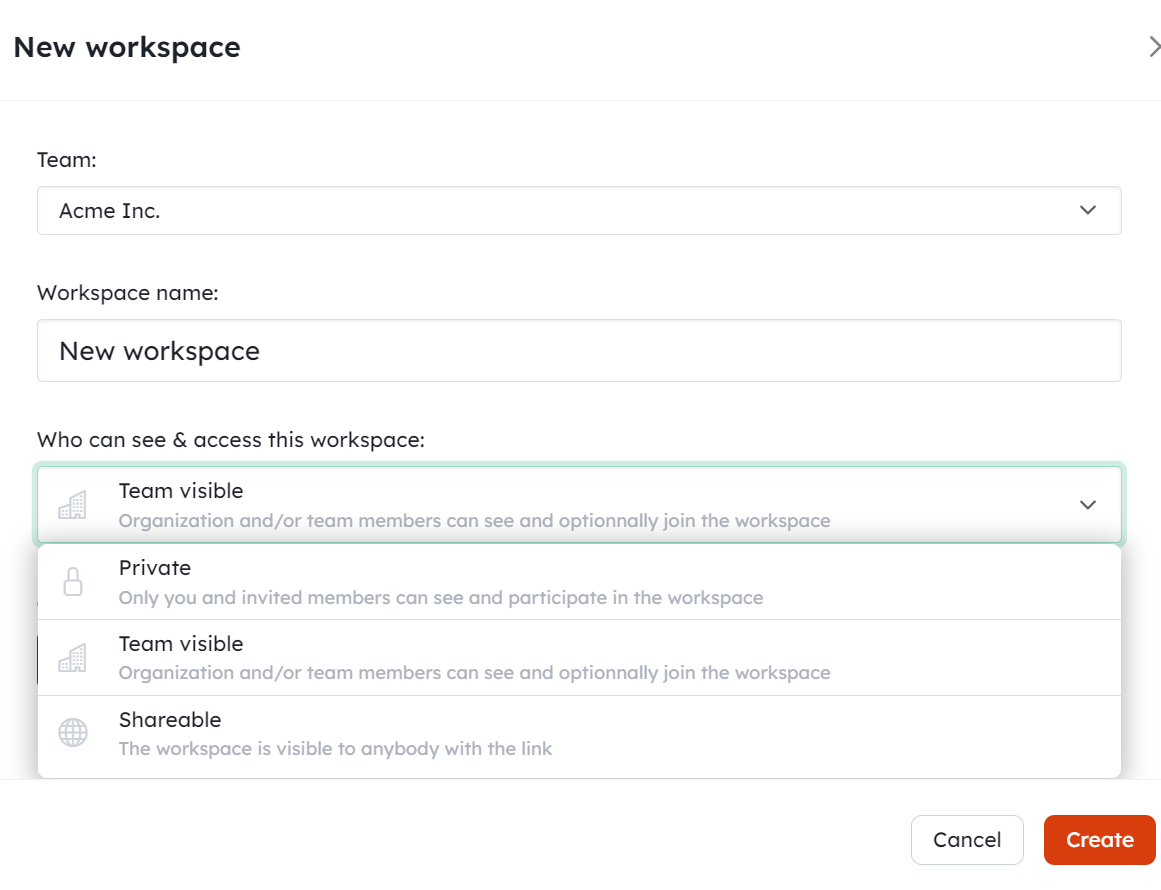
If you do not want to show it during the construction phase, select “Private” - When you are ready to make it visible, go to the workspace settings to change the visibility.
- Your workspace is created and your default view is identifiable by this symbol.

Add your workspace to “favorites” to find it directly in your left sidebar. To do this, click on the workspace menu then “Add to favorites”.
Import existing projects
You can import existing projects
- from a spreadsheet.
- from external services such as Github, Trello, Asana etc.
See our guide [Integrations with Third-Party Services](/help/guides/integrations)
Create a structure - Lists
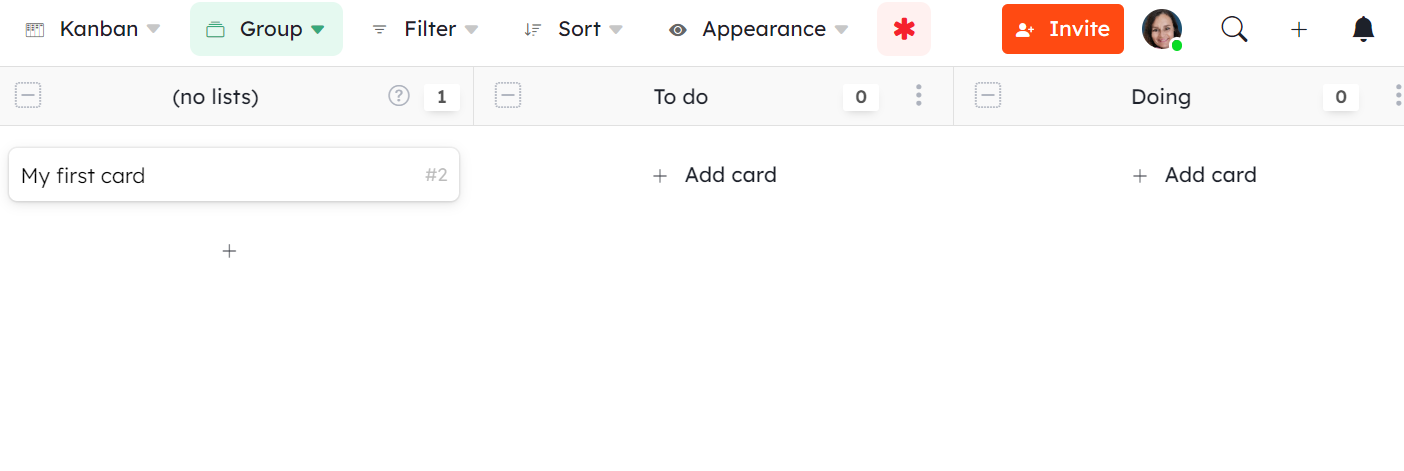
- If you start from an empty project, the default view will be a Kanban with a list created by default and named “no lists” which will contain all the cards not assigned to a list. You can hide this column by clicking the ➖ button.
- Customize “Lists” which can represent steps, statuses, data types. To do this, click on the ➕ button, modify the name of your list and click on
add. - Rearrange the positioning of your columns by drag and drop.
Viewing mode
The Kanban board is not enough to work effectively on a project. What if you have to manage critical deadlines? Record hours worked and costs? What if you need to collect customer feedbacks? Monitor team productivity and progress? And yes, Kantree offers tools that will suit all these situations!
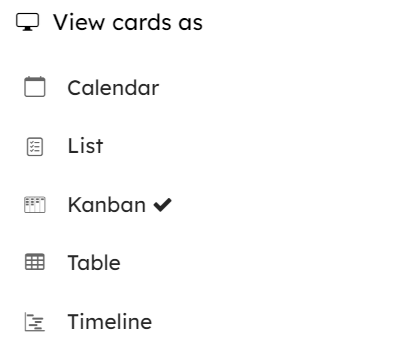
Click on View cards as to change the presentation of your project. For Calendar and Timeline views, cards must contain at least one date field to display.
👉 Kantree was designed so that each employee can view a project according to their habits and preferences. These viewing modes are available to you as the creator of the project but also to the people with whom you share them. Thus everyone can collaborate in the project by tuning it according to their work habits.
Feed a project
Create a card
A card can represent any type of data: task, contact, contract, customer, etc.
- Either you create your first card from the ➕ button at the top right of your screen and in this case it will be positioned in the list of unassigned cards “no lists”.
- Either you position yourself on the column in which you want the card to be added by clicking on
Add card.
- Cards can be moved inside a column but also from one column to another by drag & drop.
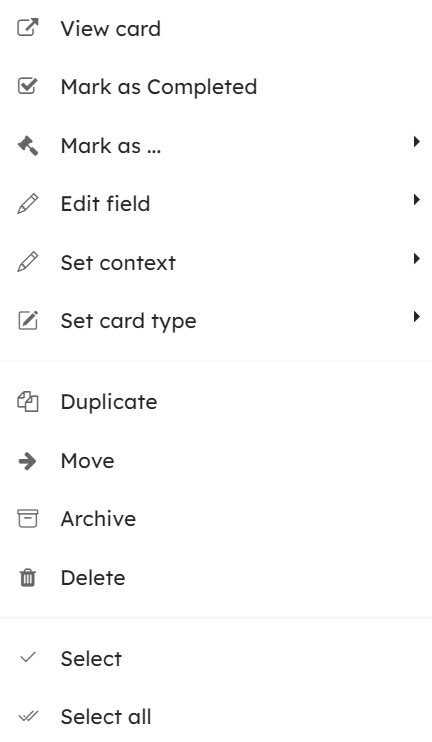
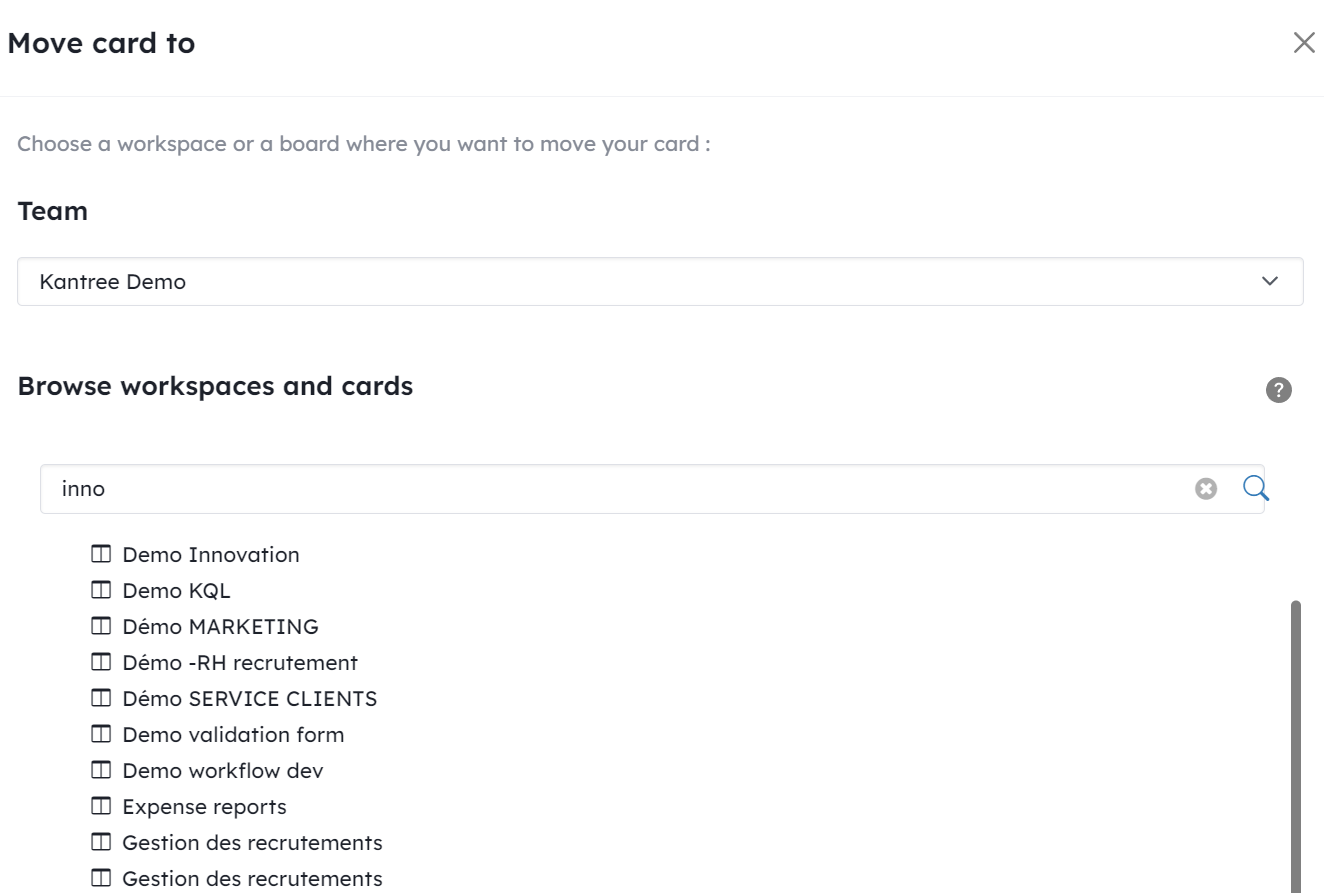
- Via the menu available from the card by right-clicking, you can move a card to another project.
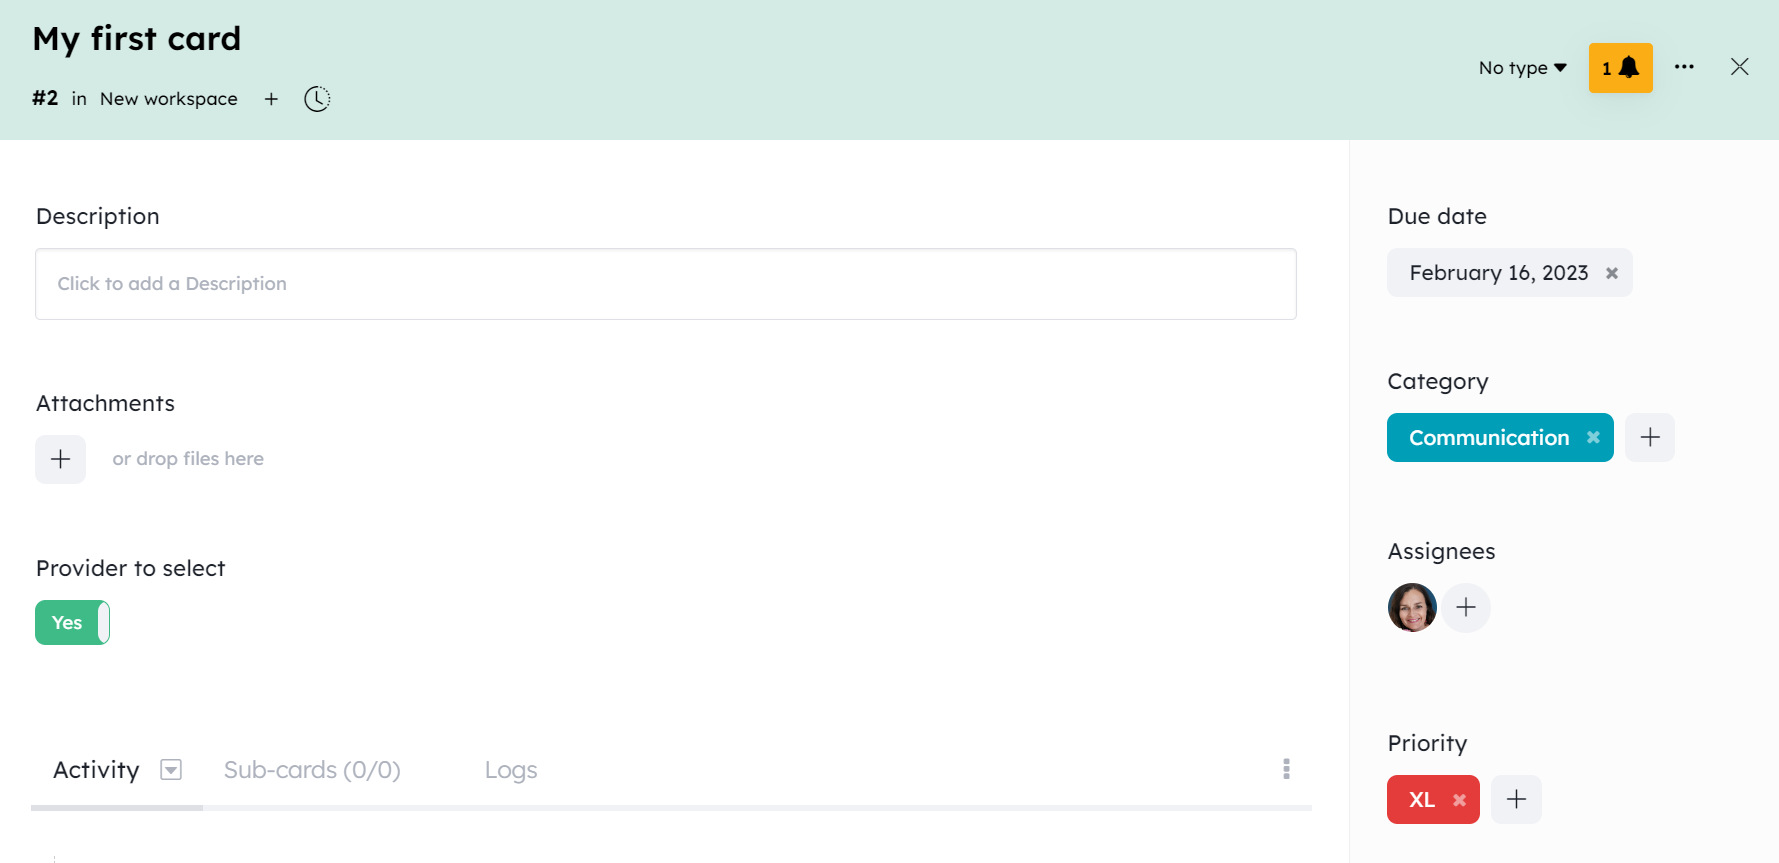
Display a card
- Just click on the reference number of the card preceded by a # positioned in front of the title of the card to access its content.
Each card has its own URL available in its menu with the option “copy card URL”. It allows you to consult it in a tab other than your current workspace.
- You can choose to pin it to the right of your workspace by clicking
Dock to the right
Customize your card
To customize the structure, go directly to one of your cards and make the desired changes. You can change the title of the fields, their location by drag and drop and even their color.
To add a field, click on the ➕ button and you can choose from a list of possibilities depending on your type of data.
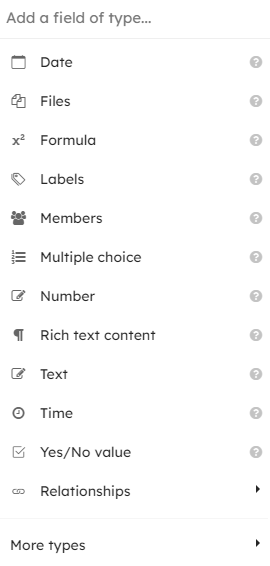
When you add, modify or delete the properties of a field (title, type, properties), this impacts all the cards in your workspace.
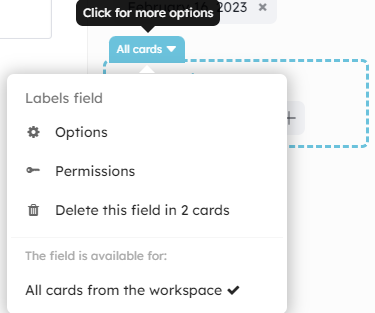
To remove a field, click on the More options drop-down menu
Define card types
Kantree allows you to manage several types of cards within the same workspace. You can then create cards according to the type of cards you have selected.
To create a card type, open a card and click on No type in the top right and create a card type by entering a new title in “Create new type”.
Arrange the card fields (make sure you have the desired card type selected before editing the fields).
You will find a section for managing card types in the Workspace Settings. From there, you can, for example, decide which type of card will be offered by default.

As an Administrator, you can make the same type of card available in several workspaces.
Create custom views
Filter
You can filter the cards in a workspace to only view the cards that interest you. Default filters are offered to you but you can filter according to all the fields you have created.
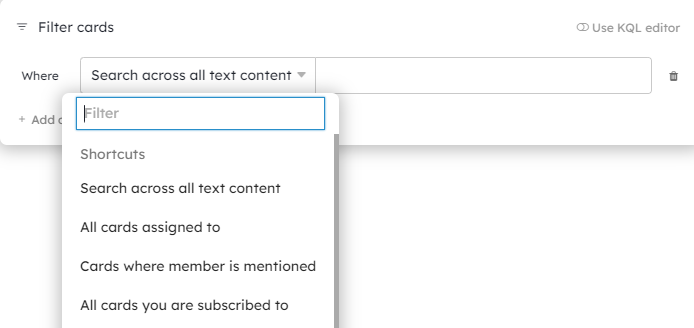
Kantree has a powerful query language called KQL (Kantree Query Language). It allows you to perform very precise queries in your project by integrating formulas. Learn more about KQLwith our guide.
Appearance
The Appearance menu allows you to determine view-by-view display options. If you apply these preferences to a view already created, remember to click on Temporary view to save the changes (see next chapter).
* **Displayed fields*: enable or disable the fields to be displayed in the card preview
* **Displayed fields/ other*: display card reference, number of comments, number of sub-cards, cover image (option of attachments “Use as a cover on the card”)
* **Sub-card’s fields visibility* : show everything, hide everything, display the same fields as the parent card
* **Display density*: activate the normal, compact, large mode
* **Ungrouped* for a grouped view, display the cards that do not have a value entered in the field used for grouping.
* **Descendants:** display the sub-cards
* **Archived :** display archived cards
* **Expand the columns to fit the screen**
Strike done cards : the card titles are crossed out when you use in the menu of the card “Mark as Completed”
Show progress : in Kanban view, displays a progress bar column by column and an overall progress at the bottom of the view. These progress bars are based on the statuses present in the card menu: ongoing, completed.
Hide empty groups: in a grouped view, allows not to display groups that do not contain maps.
Maximise / Minimize : displays all the columns in folded or unfolded mode, display or not the subcards
of the card.
Show in full screen : display the view in full screen to present or facilitate a print
Actions : allows to add automatic action buttons (trigger: when you manually select the rule)
in the view-by-view toolbar.
Save a view
Whether you changed the view or used a filter, you can save a view to:
- avoid recreating your filters each time you need to consult this view
- share only interesting data with your collaborators
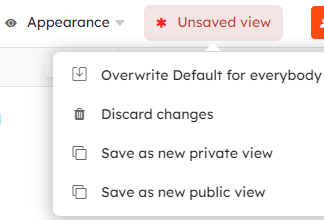
To do this, once the filters and the view meet your expectations. Click on the red asterisk ﹡ to the right of the “Appearance” menu and then on “Save as new view”. You will find it in “Private views” or “Views” depending on the visibility option chosen.
Kantree allows each user to tailor the appearance of the project to individual viewing preferences. Each person having access to a shared project can collaborate on it by applying the most suitable view!
Advanced Features
There are other features you can add to power or visualize your projects. These are available in the menu that appears when you click on Add view.
Once activated, you will find them in the “Views” tab of the workspace left sidebar.
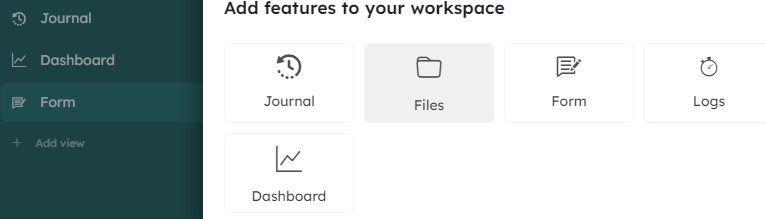
- Journal: view focusing on activities
- Files: files added to your workspace
- Form: create cards from a form - See our guide on [forms](/help/guides/forms)
- Logs: view the logs that have been added to cards - See our guide on [logs](/help/guides/logs)
- Dashboard: visualize your project with charts and indicators - See our guide on [reporting](/help/guides/analytics)
Create a form
👉 Before creating your form, check that all the fields you want to be populated actually exist. This way, you can select them when configuring the form.
Integrate your usual forms (available on your website or on your internal channels) into Kantree. Thus, they will directly feed your project by creating cards and following the workflow that you have configured. You can even use Kantree to respond to people who have filled out the form eg: support tickets, application process etc.
Click on Add view under public or private views then click on Form.
Choose the visibility of your link in “Accessible by”.
Give your form a name, add a description. This description will be displayed in the header of the form.
You can then activate options concerning actions after sending the form: sending a confirmation email, the place where the card will be created in your project (1 single destination list).
Then build your form with the list of fields (fields of your card). Modify the “Label” and the “Description” to customize what should be displayed in your form. The first section of fields corresponds to the fields existing in your card while in the second section, these are fields visible only in your forms.
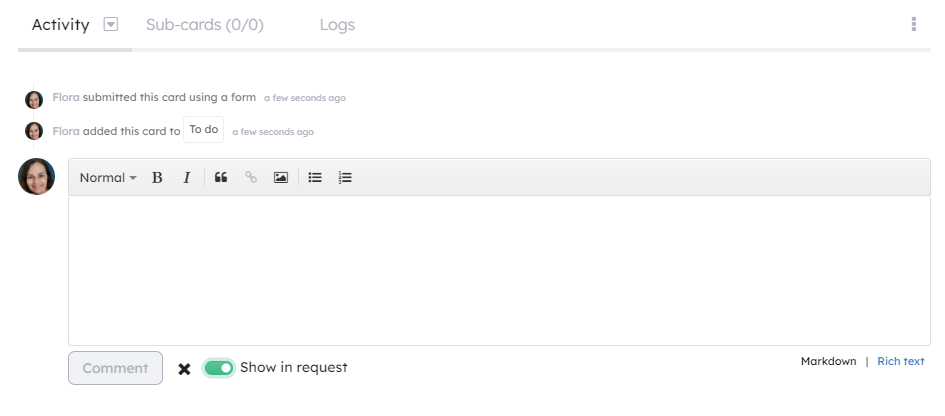
You can allow the sender of the request to comment, this allows you to chat with them directly and record these interactions. To do this, click on Comment in “Activity” at the bottom of your card and then move the cursor
Show in request. If this option is not activated, the message will only be visible to members of the workspace. So you can both communicate with the sender and add internal comments.
See our complete guide for [forms](/help/guides/forms).
Automate actions
Automations allow you to generate actions within a workflow.
To create a rule, click on Automations in the left sidebar then Add automation.
Any rule must start with a trigger that you choose from the list provided. You must then choose the expected action.
Click on Save.
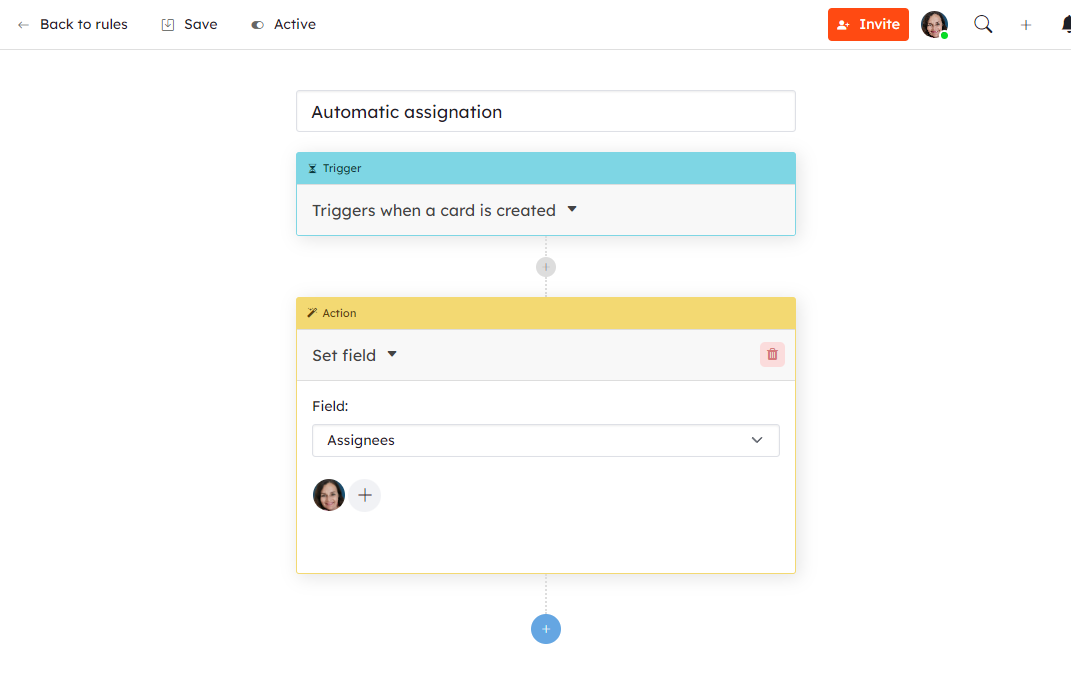
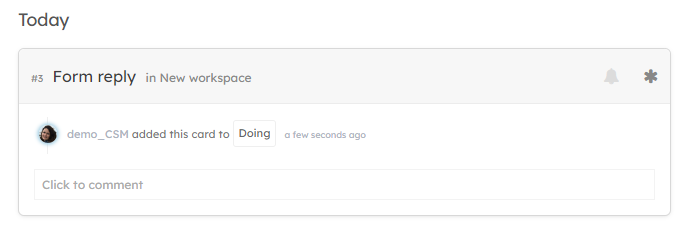
Once active, your rule looks like this.

👉 If you no longer need a rule, consider deactivating it temporarily.
Automations allow you to go much further by integrating:
- conditional branches
- email generation
- form generation
- the ability to pause a rule pending user action
- manual triggering of a rule
See our complete guide for [automations](/help/guides/workflow-automation)
Collaborate on a daily basis
Create teams
The creation of teams allows you to create a place where you will find projects belonging to a group of members. This facilitates the readability of your organization: positioning of projects according to business units, teams and desired access.
Invite to join a project
If you are the owner of your workspace, you can invite collaborators or outsiders to join your workspace by clicking on Invite.

👉 for outside people without a license, access will be read-only.
As an Administrator you can also manage roles by going to the workspace menu “Settings” then “Roles”.
See our guide on [managing roles and permissions](/help/guides/collaboration#managing-roles-and-permissions).
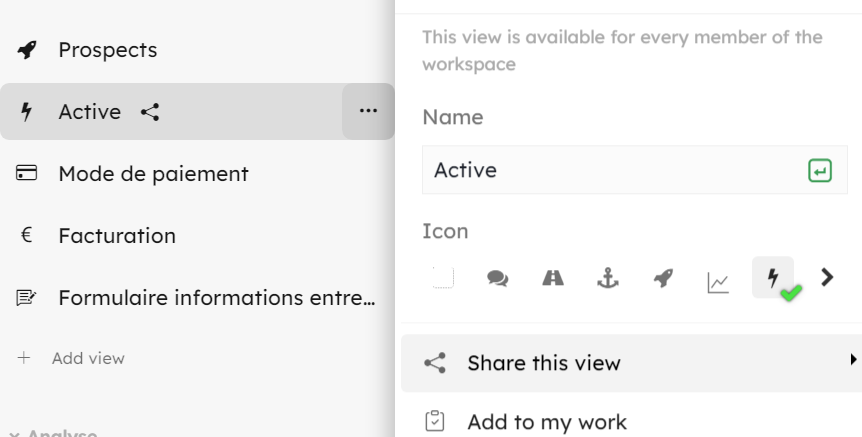
Share a view / Link / QR code
If you want to share only certain cards in a view, use the filters then share the url link if the recipient is a member of the workspace or if not, generate the link or QR code (read only)
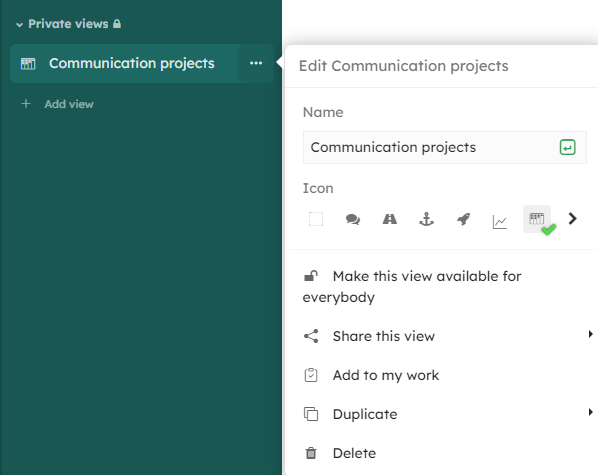
Click on the “…” next to the view title.
You can save the QR code or print it (ctrl + P)
Interact on cards
Interaction with collaborators on the cards is done through the “Activities” / “Leave a comment” section.
Add an @ to tag a workspace member.
Notifications
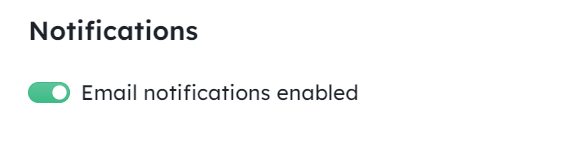
From Kantree and your mailbox Kantree sends you notifications when certain actions are taken by other users. These notifications can be viewed from Kantree, and some can be sent to you by e-mail if this option has been activated in the workspace settings.
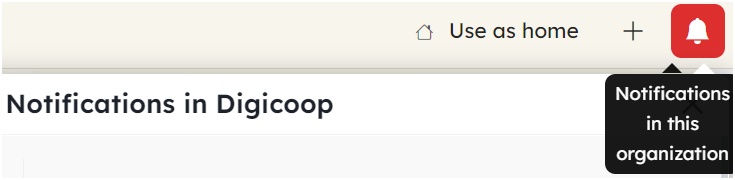
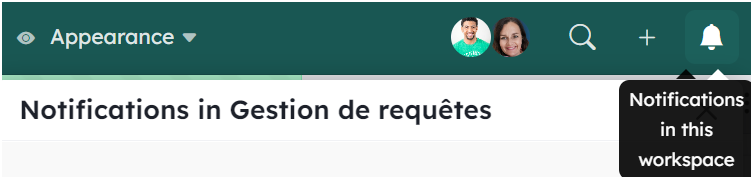
Notifications in Kantree are visible from the organization or workspace in the top right-hand corner of the screen. When a notification has not been viewed, the bell icon turns red. Click on the icon to display the content. You’ll also find this icon in My Work / Inbox (see next section on My work
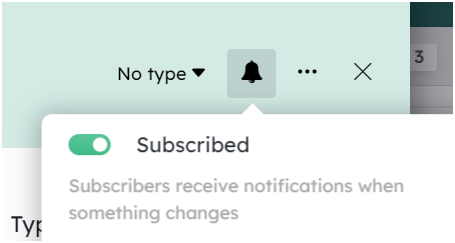
By default, an assigned person (Members field) is subscribed to the card. If you are not assigned to the card, you can subscribe to a card by clicking on the bell icon at the top right of the card and activating the subscription.
You can subscribe to several cards at the same time by :
-
selecting the cards (ctrl + right-click) and performing a batch action
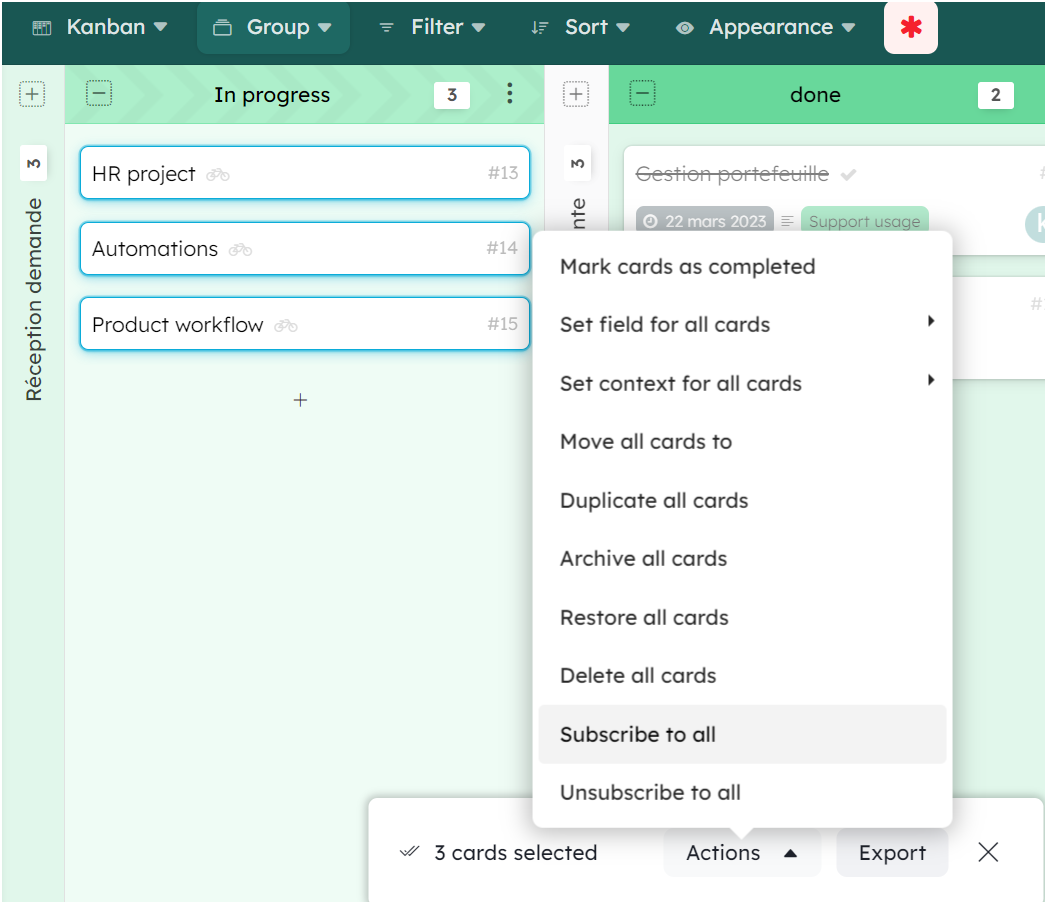
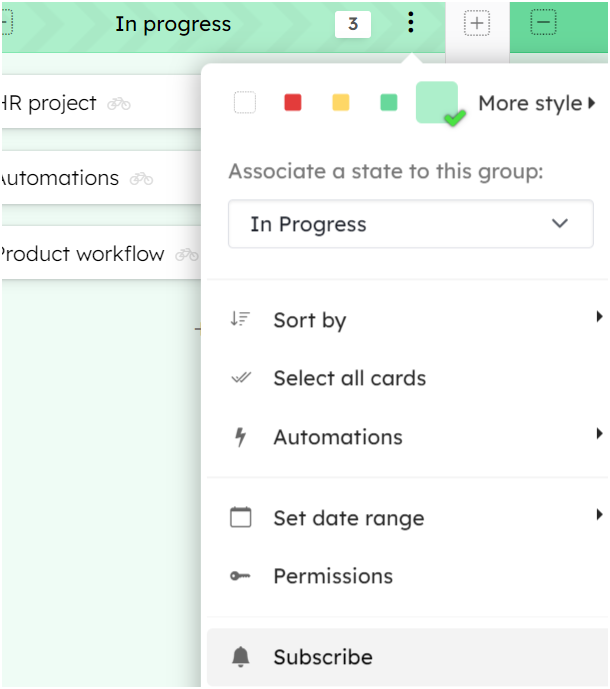
- in Kanban grouped view, by subscribing column by column via the menu “…” “Subscribe”. “Subscribe” menu. This allows you to be notified when a card enters or leaves the column.
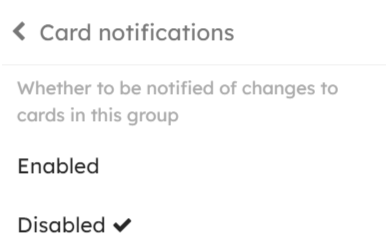
To receive all card activity in the column, once you’ve clicked on “Subscribe”, an option appears in the “Card Notifications” menu, click on “Enabled”.
Notification details\
Each card has an activity stream, but not all generate a notifications
If you need this level of detail, go card by card, or create a Journal view (see Activity Journal section).
Some actions do not generate in-app notifications, but only an email notification (see list below).
| Activities sent
| Who is notified ? | In-app | Email (if activated) |
| —————————————————————————– | ——————————————– | —— | ————————————- |
| Mention in a comment() | | ✔️ | ✔️ (even if disabled in workspace) |the mentionned ones
| Add a comment on a card | The subscribers (card) | ✔️ | ✔️ |
| Assigning a card to a Member field | Subscribers (card) and assigned member | ✔️ | (for assignee only) |
| Unassigning a card in a Member field | Subscribers (card) and unassigned members | ✔️ | (only for unassigned) |
| Moving a card to another card | Subscribers (card) | ✔️ | ✔️ |
| Moving a card to a different group (context or label fields) | Subscribers (card, group) | ✔️ | ✔️ |
| Moving a card to a different workspace | Subscribers(card) | ✔️ | ✔️
| Convert a card into a project | Subscribers (card) | ✔️ | ✔️ |
| Convert a workspace into a card | Subscribers (high level card) | ✔️ | ✔️
| Archive/Restore/Delete a group | Subscribers (high level card) | ✔️ | |
| Change card status | Subscribers (card) | ✔️ | ✔️ |
| Archive/Restore/Delete a card | Subscribers (card) | ✔️ | ✔️ |
| Create a card | Subscribers (card, group) | ✔️ | ✔️ |
| An expiring card reminder (or a date in a date field) | Members selected in the reminders | ✔️ | ✔️ |
| ————————————————————————– | ——————————————- | - | - |
| Import a project](<>) from an external source (other tool, spreadsheet…) | The workspace creator | | ✔️ |
| Invite a user to an organization/team/workspace | Guest user | | ✔️ |
My work - Your personal project hub
It is your personal hub that allows you to quickly access the most important information. The objective of My Work is to centralize all the cards, activities, requests for which you must be informed quickly.
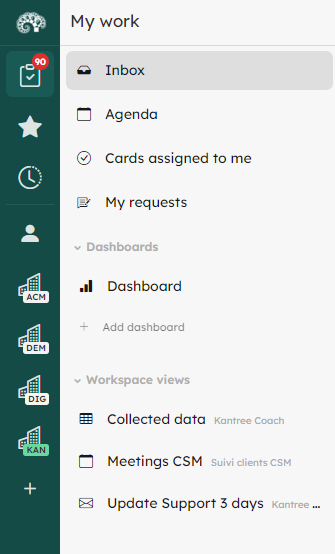
- Inbox: activity stream in chronological order
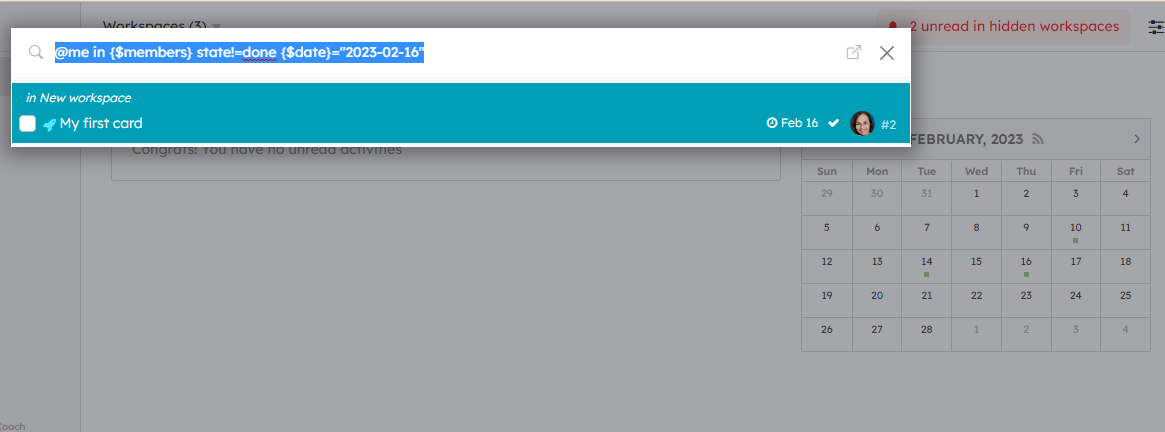
- Agenda: a calendar view of your upcoming deadlines
A calendar is displayed on the right and materializes the upcoming deadlines with a green dot. You can click on it to bring up the card concerned.
- Cards assigned to me: list of cards where you are involved
- My requests: generated via forms
- Dashboard: reporting on several projects to have a macro view
- Workspace views: the views you have chosen to add to “My work” in order to find them easily
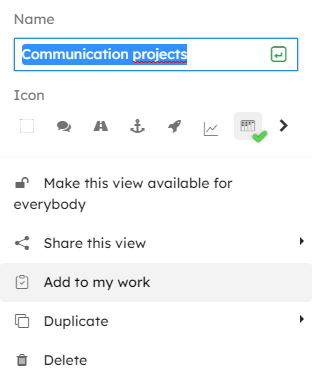
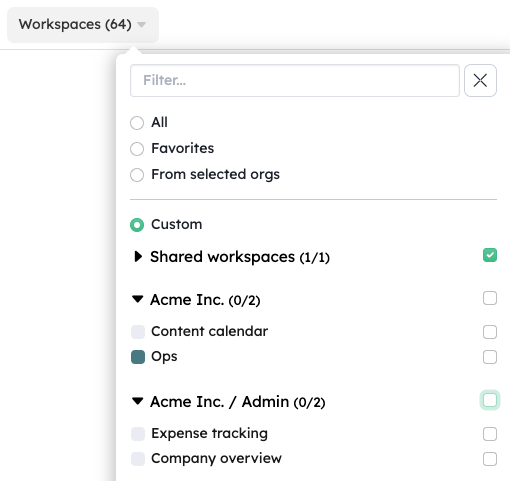
By clicking on Workspaces, you will be able to decide which projects you want to follow.
From My Work, you can open the card affected by the notification. Clicking on the gray asterisk ﹡ will mark it as “read”, then it will disappear from the information flow.
You have a question ?

Ask our team for help, send feedback and suggest new features at support.kantree.io.
Follow us on @kantreeapp to keep informed of our developments. Take a look and contribute to the Kantree roadmap on the public board: dev.kantree.io.