Customizing groups
Kantree gives you a unique concept to represent all possible ways of grouping your cards together.
If you’re working on a software product, you can create Sprints, milestones, releases, epics, labels…
If you work in Human Resources, you can group your cards by Country, Department, Subsidiaries, Job Offers…
You can have multiple collections of groups within the same project, allowing you to have multiple logics for sorting your cards. We call these project contexts.
Kantree provides lists by default.
Cards can be in groups from different contexts simultaneously.
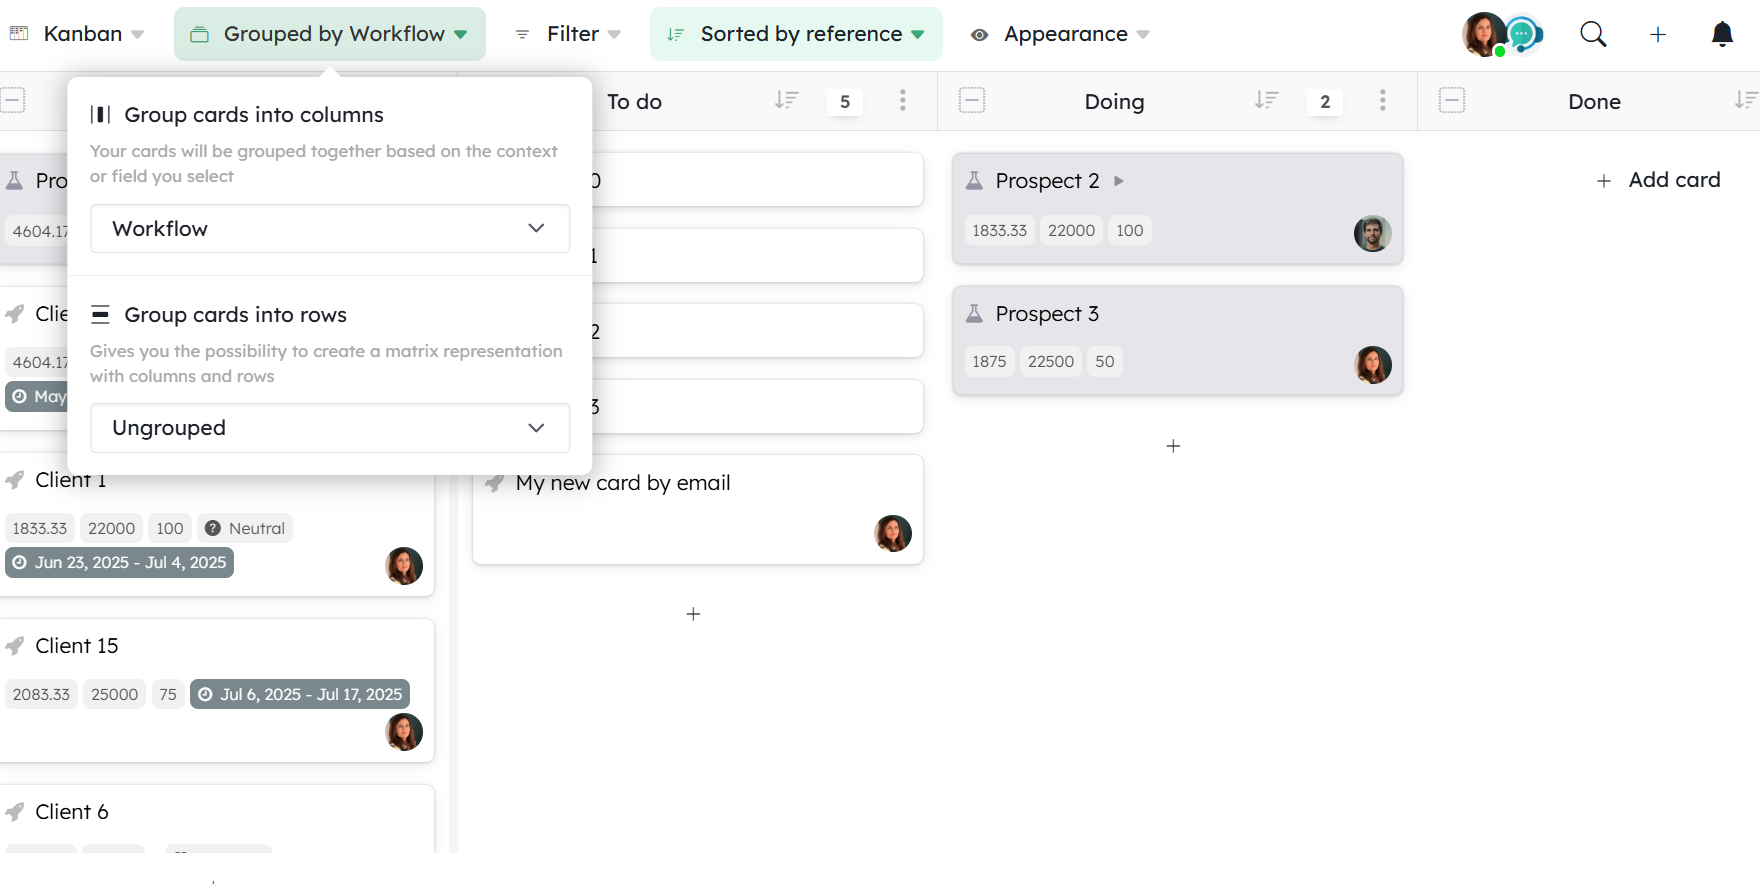
This way you can change how you view your cards by changing how they are grouped.
As seen in the guide on Card Customization, you can create fields that behave like contexts with Label and Multiple Choice field types.
If a card does not belong to any group of the “grouped by” in your view, it is automatically associated with “ungrouped” cards. You can display them by enabling the option in the Appearance menu “ungrouped”.
Adding New Contexts
Adding a new context to a project can be done very simply in the Group / Add a new context menu.
Just give it a name and press Enter.
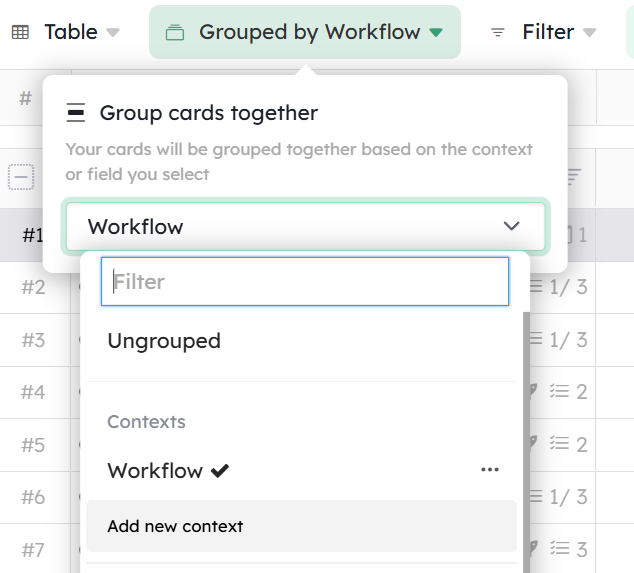
Editing a Context
Several options are available for your contexts.
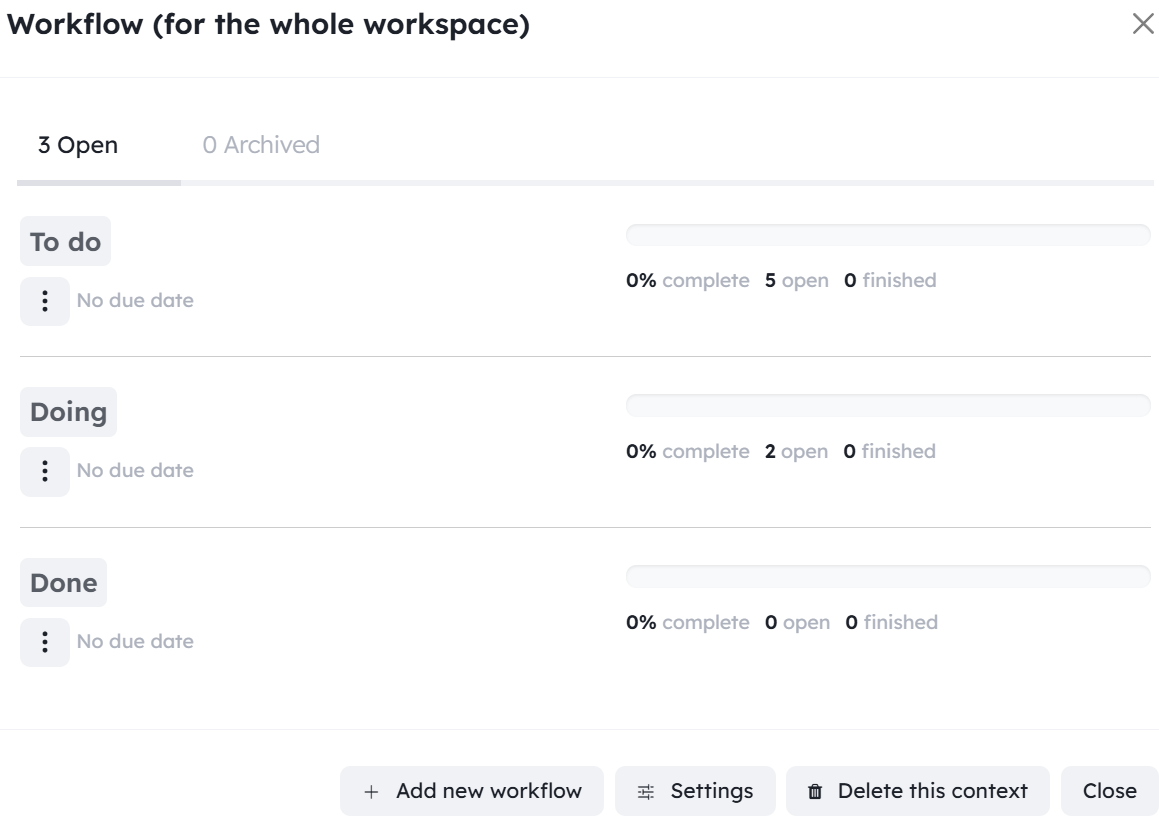
The context editor is accessible by clicking on the 3 dots next to the context label.
It looks like the following image:
If you select the option Cards can only be in one group of this type at a time, cards will only be able to be in a single group of this context.
You can also apply a random color each time you create a group.
You can choose to define a period that will be automatically associated with the groups you create. This allows you to use your groups to manage your iterations (such as your Sprints) very easily.
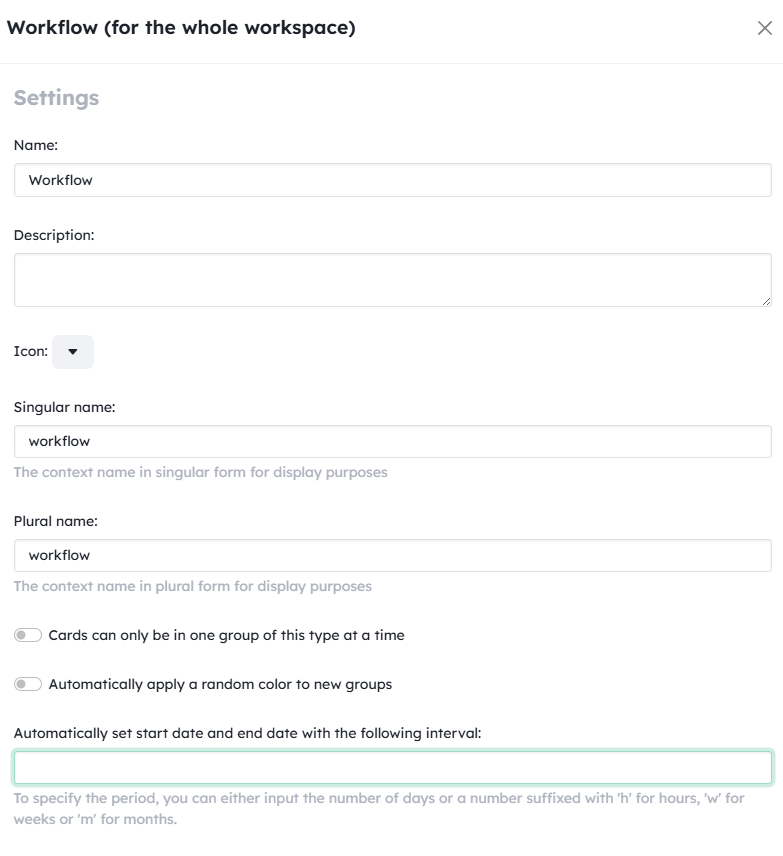
Examples:
9dor9for 9 days1w 4d, or4d 1wfor one week and 4 days1y 3m 2w 4d 15hfor 1 year, 3 months, 2 weeks, 4 days and 15 hours.
The start date of the period will be today’s date if no group exists yet in this context, or the end date of the last group created in this context.
Modifying a context will impact every project that uses it.
Deleting a Context
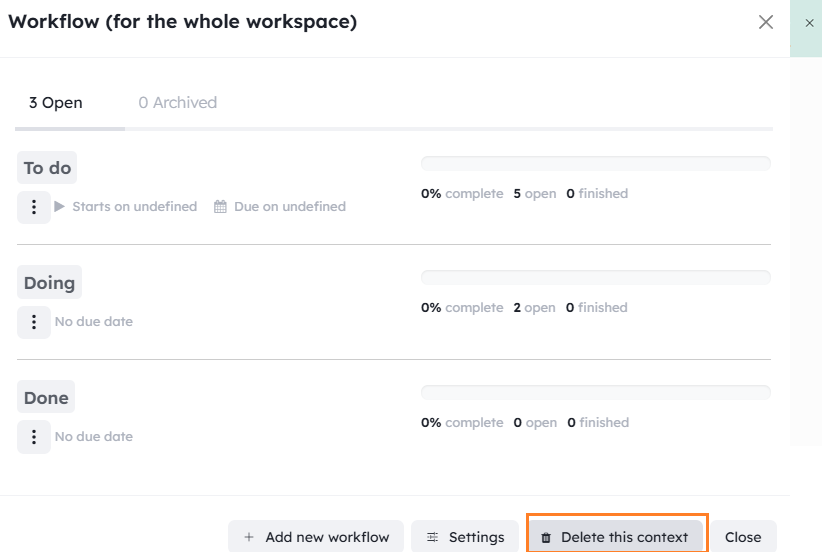
Deleting a context will impact every project that uses it, all groups in the context will also be deleted, and their references in cards will also be deleted, but not the cards themselves.
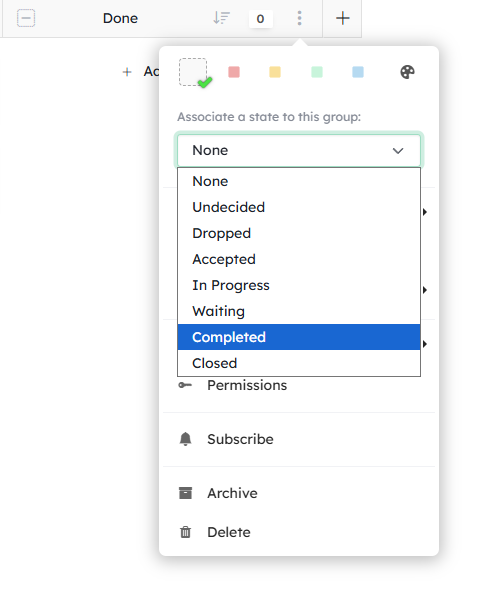
When you set a status for a group, it will change the status of all future cards you move into that group. A window will ask if you want to change the status of cards already contained in that group. This group will also appear in the status selection menu for cards.
You can also modify the permissions of your roles for this group. You will find more information in the guide on roles and permissions
You can define automatic actions and a specific card type for cards created in this group.
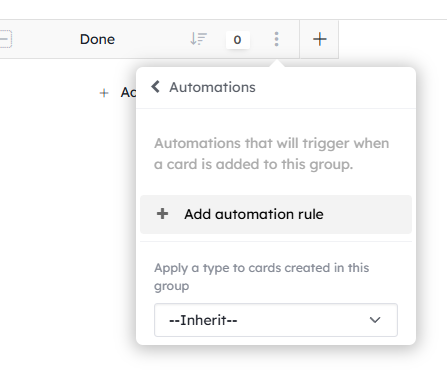
So when you create or drop a card into this group, the card fields and groups are automatically defined according to your automatic actions.
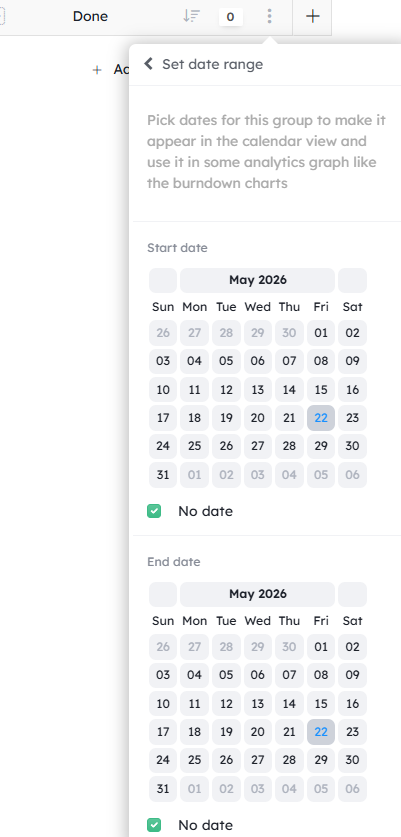
You can define start and end dates for your group. These dates are mainly used in burndown charts
Reorder cards
Inside each group (each label, each milestone, …), you can order your cards with a simple drag and drop.
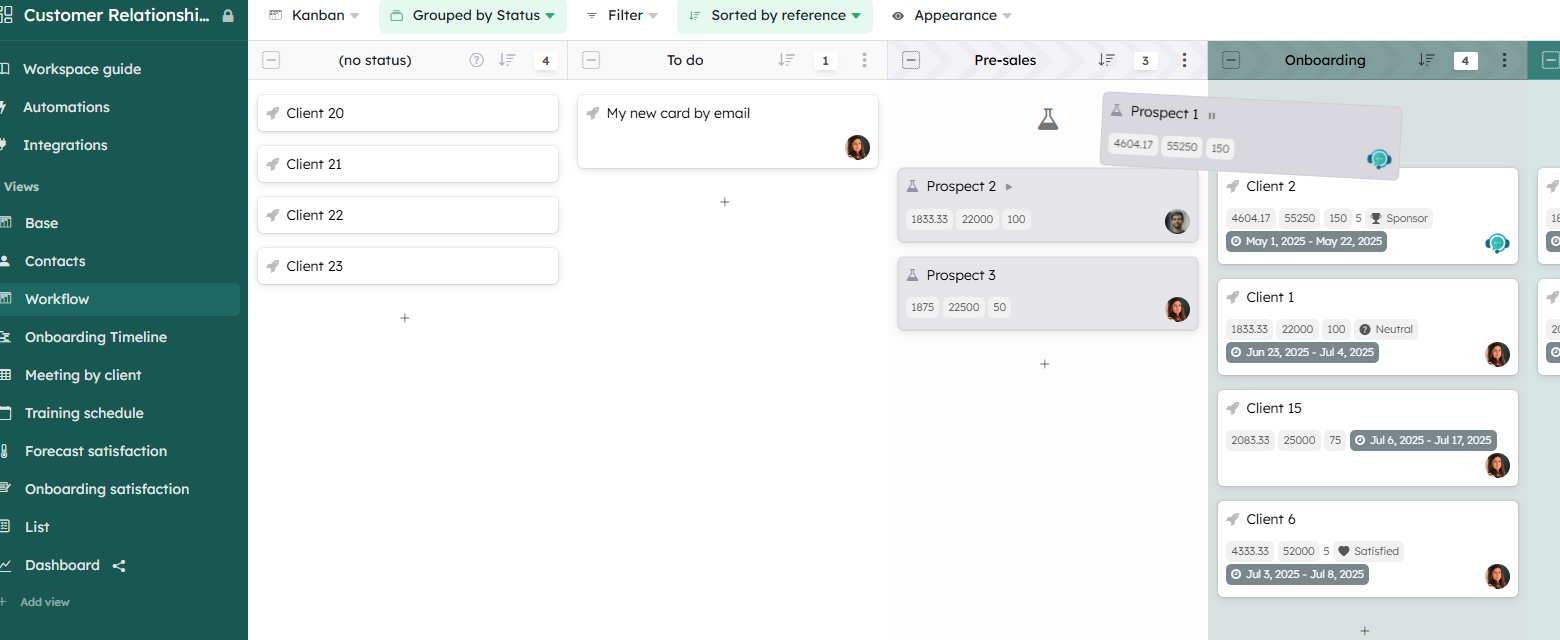
If the context or group field is configured to allow a card to be in more than one group at a time, press ctrl when moving the card and you will be able to add it to a new group without removing it from the old group.
In the group options (see above), you can also define a Sort by parameter.
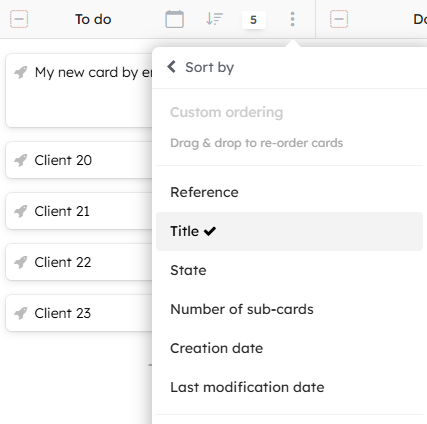
Drag-and-drop sorting is enabled by the Manual sort option. Cards will always keep track of their position in manual sort mode even if you change the way you sort your cards.
You can sort by:
- card reference
- card title (alphabetically)
- card statuses, from
undecidedtoclosed - number of [sub-cards](/help/guides/editing-cards#ajouter-des-souscartes)
- creation date
- last modification date
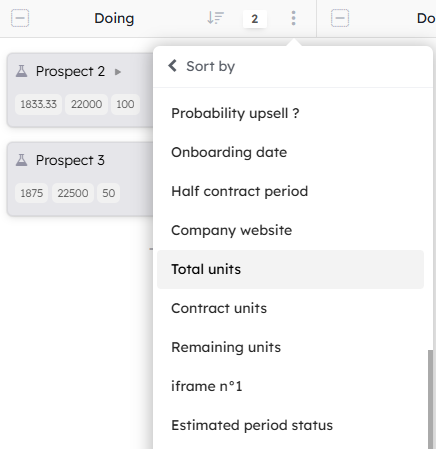
[Card fields](/help/guides/customize-cards#aperçu-des-champs-de-carte) can also be used to sort your cards.
The reverse option allows you to sort in reverse order.
If the sort option is other than manual sort, a small clickable icon will appear in the group header.
Hierarchy (#cards-hierarchy}
Cards can be organized hierarchically.
Add sub-cards to a card in the Sub-cards tab of the card.
Sub-cards are full-fledged cards!
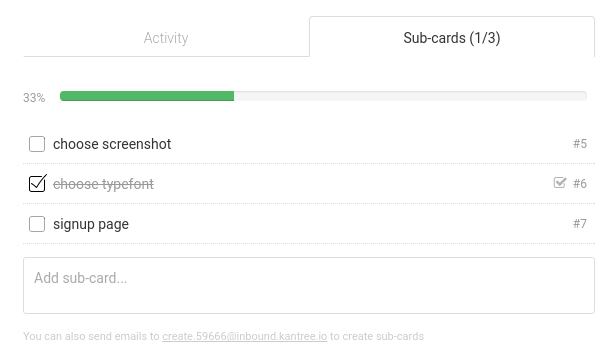
From this list, sub-cards can be renamed, marked as done or opened in its own window.
To organize the sub-cards in multiple groups, click the Create board button in the card header.
This create a new level in the hierarchy of your project. You can create as many levels as you want.
In your sub-board, you have access to all the project tools (contexts, filters, tools, saved views…). You can move your sub-cards in the kanban board.
You can quickly navigate the hierarchy of cards:
- down: click the
boardbutton in the card tile of the parent board, or in the header of the card - up: navigate the breadcrumb trail, next to the board title
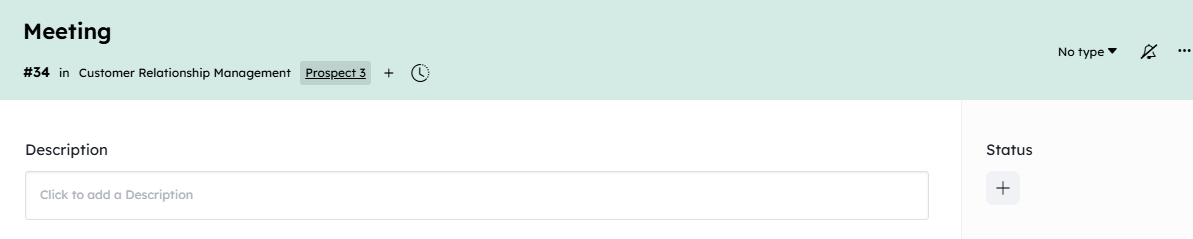
You can also open the parent card of the current level by clicking its name in the project view.
Relation between cards
You have multiple ways to bind cards together.
Field: card relationship
[The card relationship field](/help/guides/customize-cards#card-fields-overview) allows you to create links between your cards. You can select any card from any project. This will create a one-way link with the selected card.
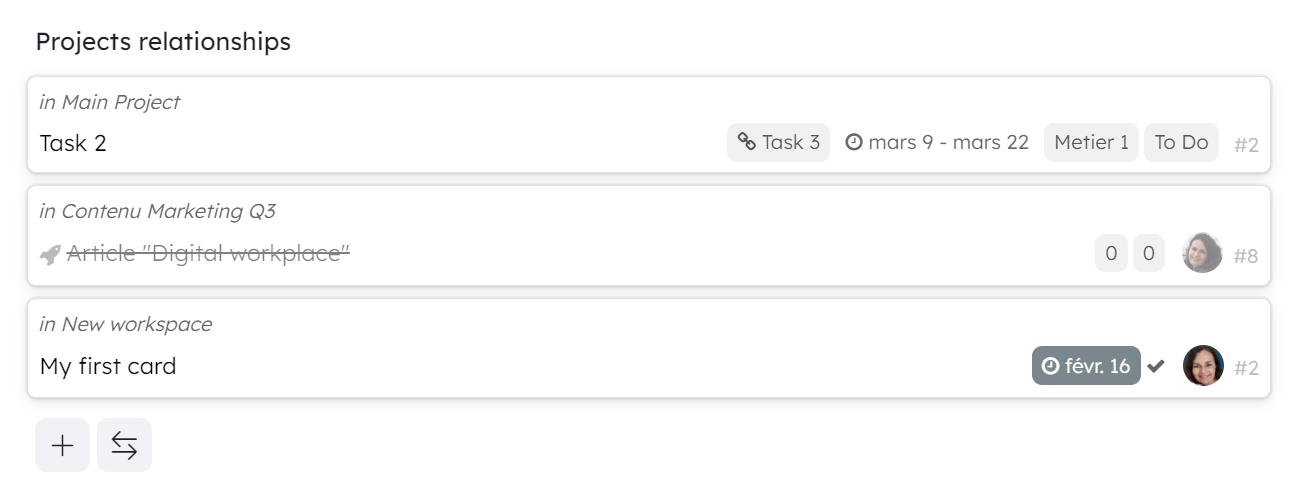
Under the bi-directional double arrows icon , by clicking on “See cards referencing this one”, you will see the cards that have referenced the card you are viewing.
If you want to permanently display the cards referring to the one you are viewing, go to the field options and activate “see referencing cards”. So the cards will appear directly without you having to click.

Important : To set up a bi-directional link, it is necessary that the name of the 'card relationship' field is the same in the origin workspace and in the target workspace.
Add Card Relationship
Click the ➕ next to the bi-directional double arrows icon . Choose on the left the workspace in which to search. On the right, you can search with the name of the card or its reference ex: #3 in the “filter” field.
Information: this “filter” field cannot take the KQL language into account.
Then choose the card relationships to add by clicking “Add” or “Remove”.
You can also create a relationship with a new card you create directly from this “Add new card in Main Project” screen (example).
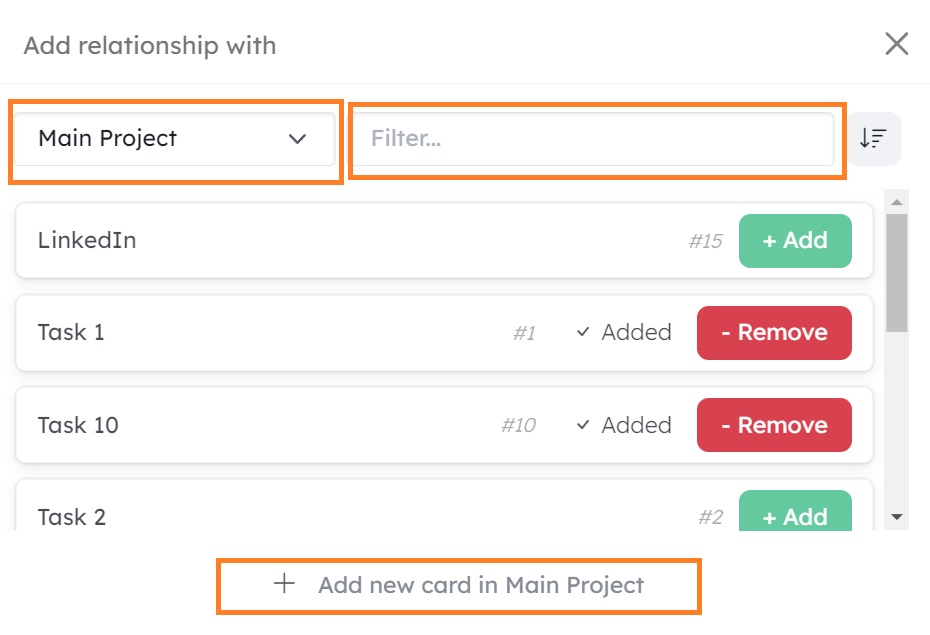
Sorting allows you to display cards in alphabetical order.
Once the relationships have been added, you can access the linked cards from the card relationship field by clicking on their reference ex: #6
✨ New feature in 2026 ✨ Appearance Options
The card relation field has been updated to help you improve the readability of linked cards through appearance customization. Linked cards are now displayed as a view: Kanban, Board, List.
- For links created with cards from the same workspace — In addition to the view type, you will find grouping and sorting tools here.
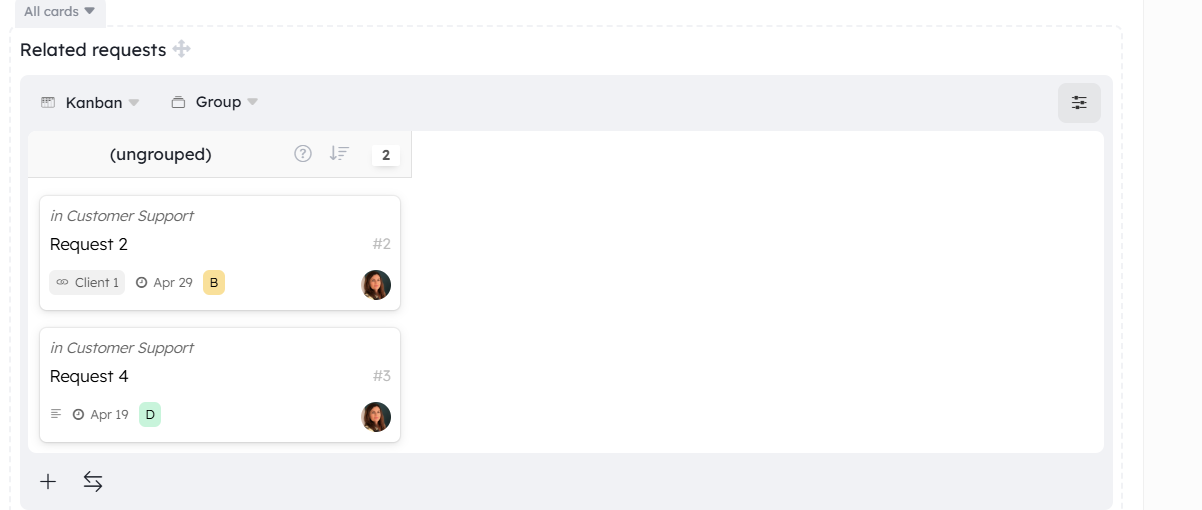
- For links created with cards from different workspaces — To make it easier to read links that can be numerous and point to potentially many different workspaces, you also have the ability to show or hide fields in the linked card preview.
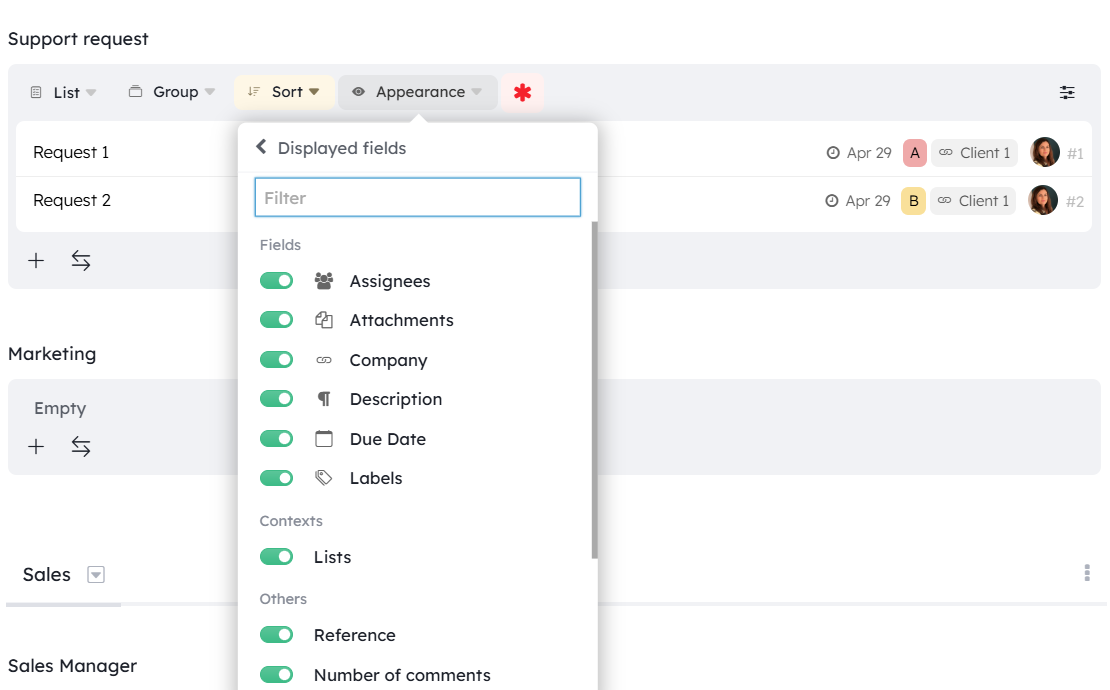
Field options
Pre-filter available cards
This option allows you to have a permanent pre-filter on the list of cards displayed when you want to add a new card relationship.
You can for example filter on subcards by adding ex: hlevel=2 or on a state ex: state=done
Update date attributes in linked cards
You can update the dates of related cards when one of them changes. You can choose whether Kantree should update the cards referenced in the field or the cards referencing this card in their field.
You will find this setting in the field options.

You can add precision by checking “Only move future dates when moved forward”
Other options
You can :
- Limit the card relationship to 1 single card by selecting the workspace in “Limit relationship to one card”
- Show cards that reference the card you are on
Look up Field
With this field you can show in your card the information (live update)
from relationships that you need to work, even if this information is in the card
of another workspace.
Example:
For a project with the intervention of several teams, you need to constantly get
the projects progress status of each other teams.
You can now view the progress from the card you are working on.
To use a “Look up” field, you must first have a Card relationship field containing a linked card. Then add a “Look up” field to your card and select the reference “Relationship” field and the field present in the linked card that you want to display in “Look up”.
Pay attention to select the field to display, at this time you must enter its title (even if a field with the same name is present in the list)
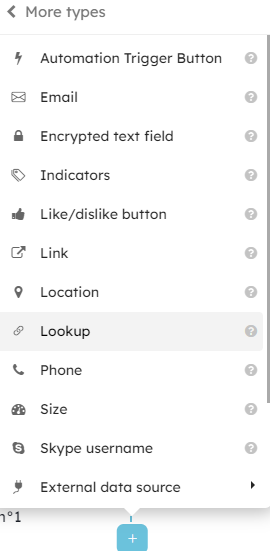
Move/Copy cards
Cards can be moved/copied to any other project or inside the hierarchy of it.
You can move/copy cards by right clicking on them or from the card actions menu. Then you just have to select the destination.
If a card/project is moved or copied in an other team, groups and models will be copied in this new team. If a card/project is moved or copied between project of the same team, groups and models will be made available in the new project.
Filter cards
To filter cards on the board (ie. search through them instantly) click on the filter box in the top bar.
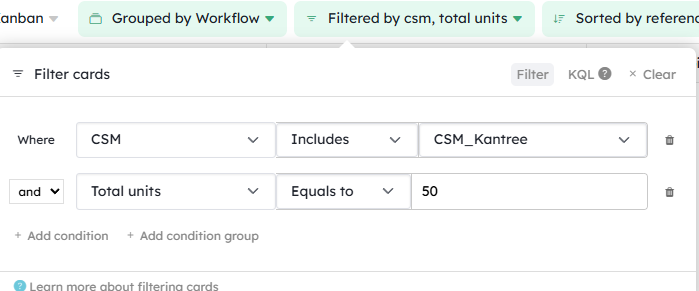
Just type text to search through card titles. You can also use the various options in the filter dropdown to create more precise searches.
Kantree features a powerful query language called KQL (Kantree Query Language). It allows you to make advanced searches in your project very easily. Learn more about KQL.
You can also toggle the archived card and groups, or flatten the hierarchy of cards (every card and subcard will appear on the same board)
In Kanban and Table view mode, the number of matching cards is displayed in the headers of groups.

You can save a filter using our saved views system
Once the results are displayed, you will have access to some batch actions like archive or set fields, which will be applied to all the filtered cards.
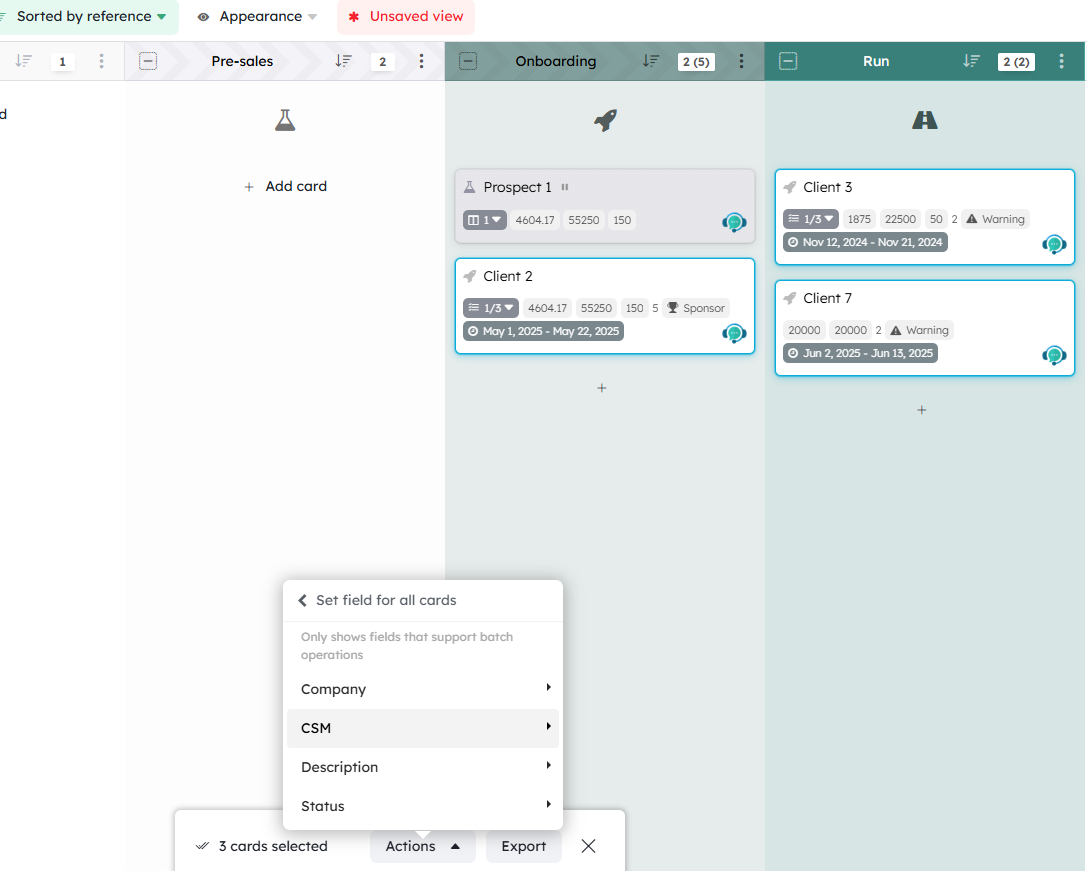
Archives
Kantree gives you the possibility to archive groups and cards rather than deleting them. Archived cards and groups will be visible if you enable them in the filter menu.
Archive a card
You can archive cards by right clicking on them or from the card action menu.
Archive a Context
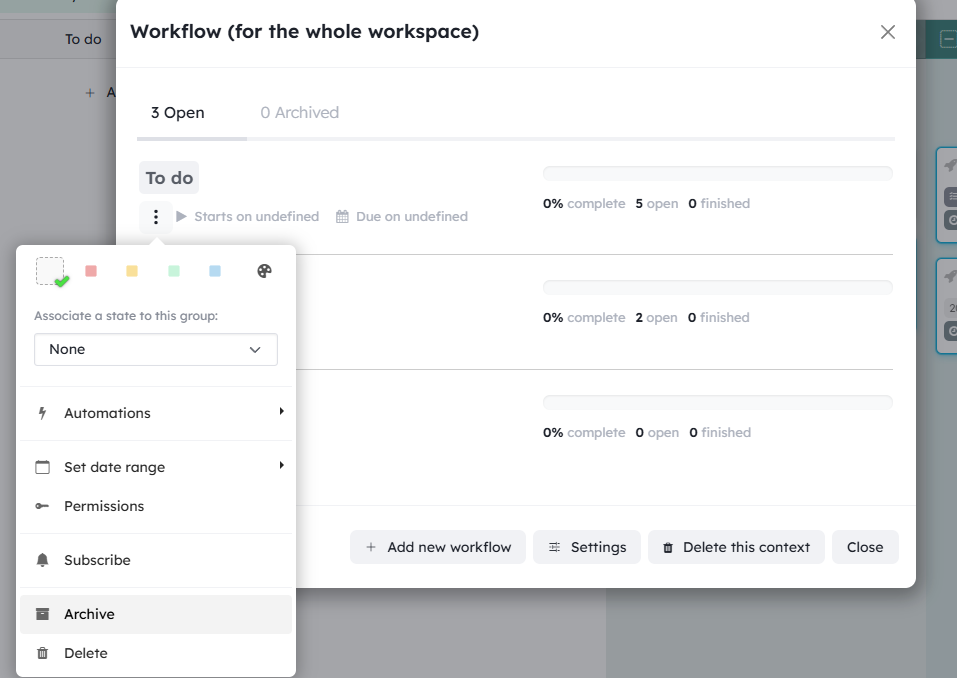
You can archive a group (or just the cards it contains) through its settings menu.
Archive a group
You can archive groups (or just their cards) from the group settings menu.
Visualize archived cards
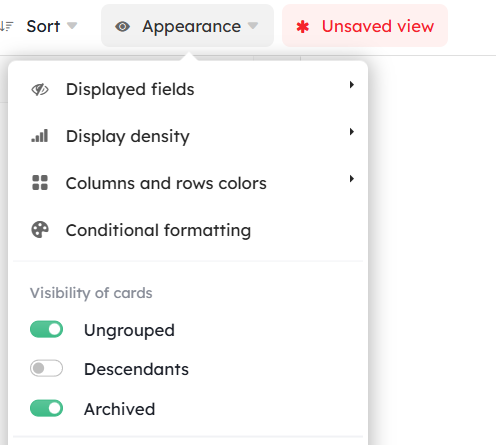
You can display archived cards by checking “Archived” in the Appearance menu
Archive a project
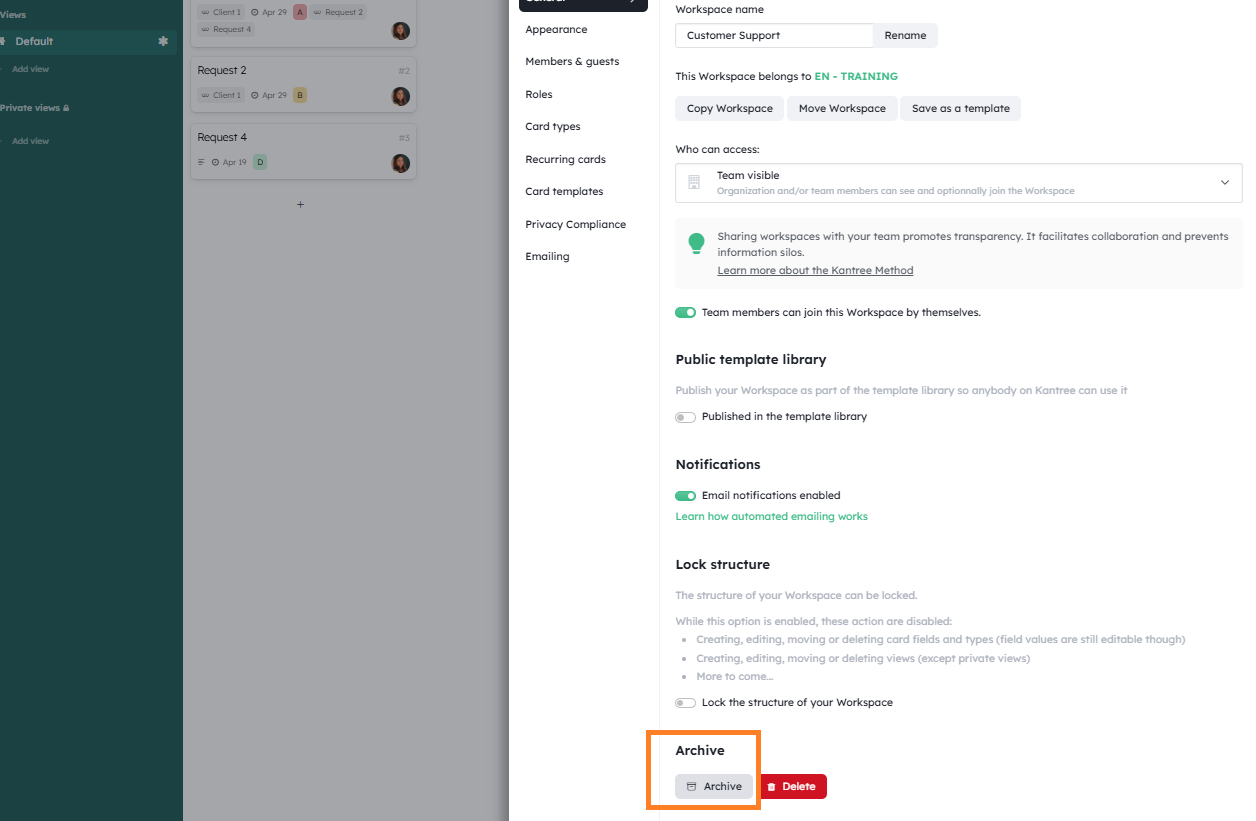
Projects can be archived (by admins) in the team’s page by clicking on the button Archive this project.
Archived projects can be included in your team’s page by checking “Toggle archive”.
Favorite cards
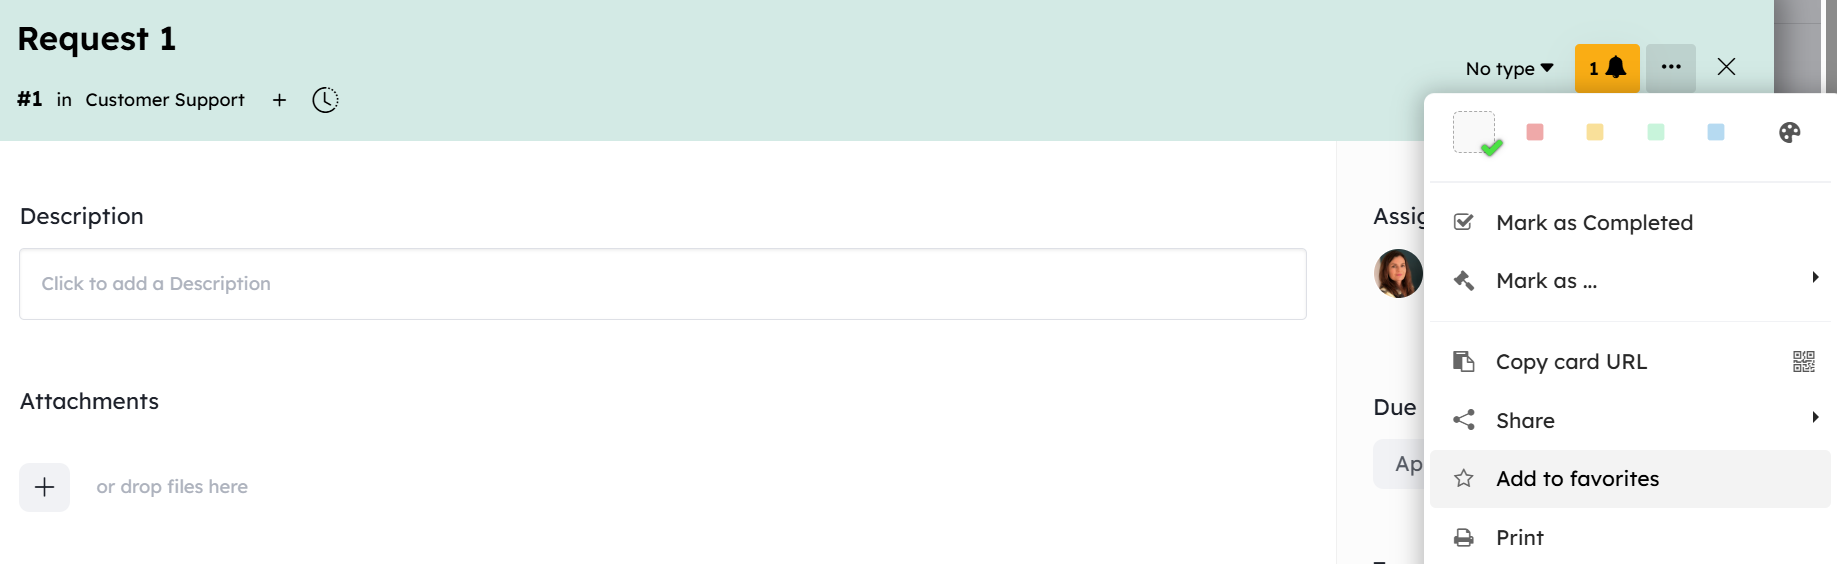
Any card (project included) can be added to favorites: It will appear on top of your dashboard and of the switch menu.
To add a card to favorites, choose “Add to favorites” in the card action menu.
Organize your cards
From the tool menu, you can access the Kanban or Table tools to organize your cards.
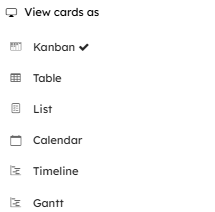
Kanban
The Kanban is the default view of your project.
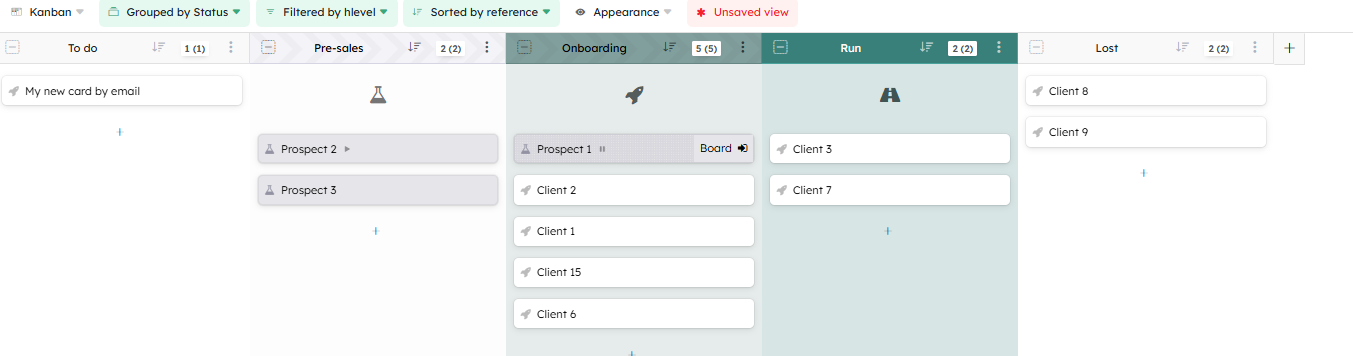
Tiles are cards, and columns are groups (or dynanimcally generated groups from your fields - like members).
You can organize your cards in workflow pretty easily and move your cards between groups.
Swimlanes: a particular Kanban feature
In Kanban view, you can choose a second way of grouping your cards in your group by menu.
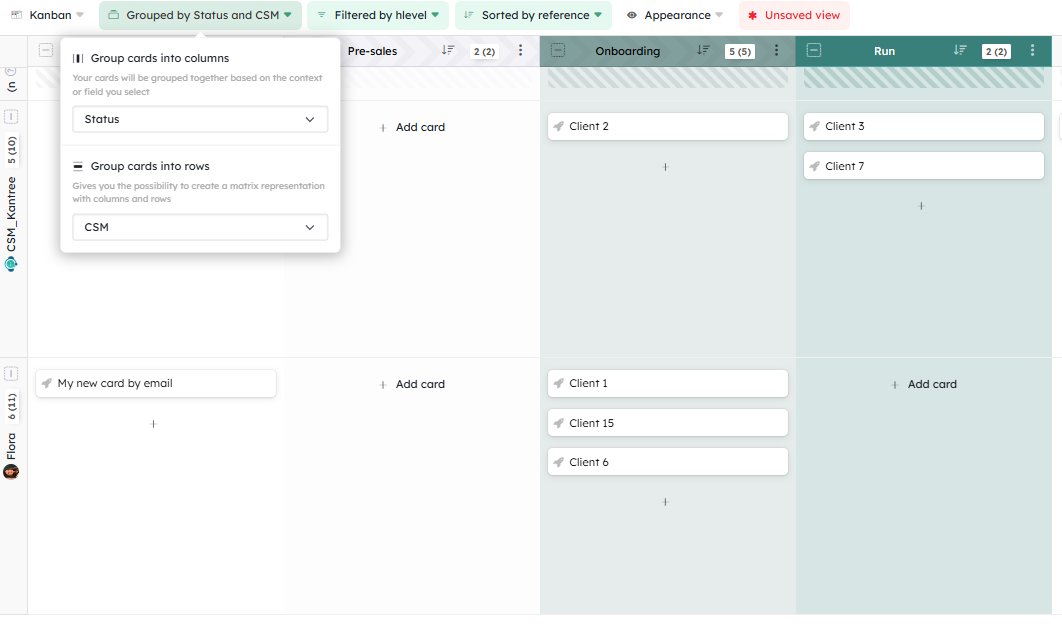
It will be displayed as swimlanes.
In swimlane mode, you will be able to:
- drag and drop your columns and lanes to reorder them (if they represent groups or fields that can be reordered)
- drag and drop cards in table cells to quickly assign groups and fields to them.
- hide/collapse columns and lane to better see the one you want.
- create cards in any cell of the table.
For now, cards in swimlanes cannot be freely reordered in cells, they are sorted by reference by default, but this can be changed in the columns’ settings
You cannot choose the same way of grouping for your columns and swimlanes (except the nothing item).
If you want to get back to a simple Kanban, choose the Nothing item for your swimlanes.
Table
In the Table, every card is represented by a row.
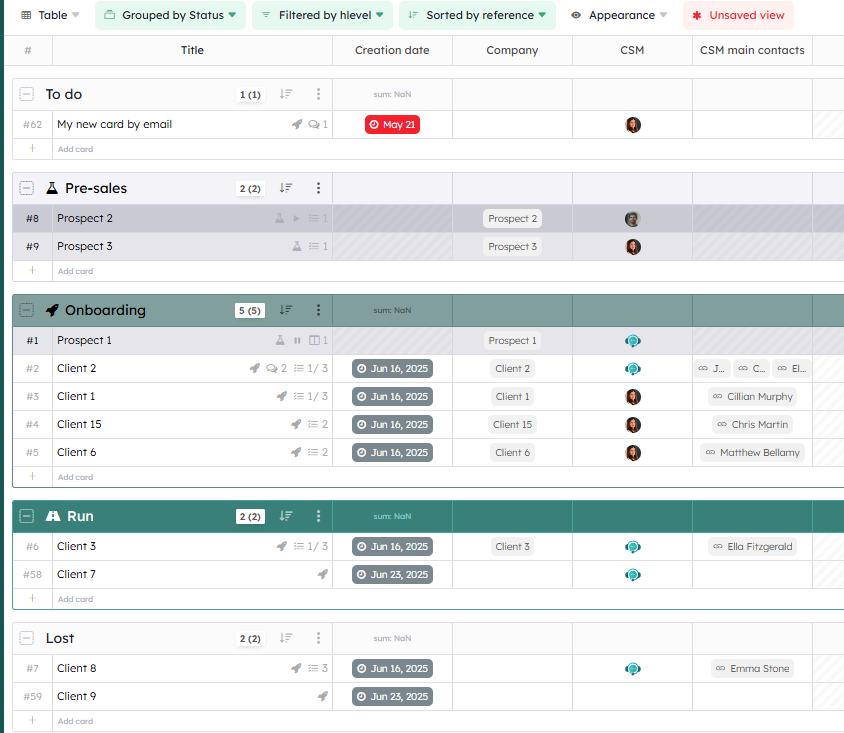
The columns represent fields. Click on a cell to edit the field.
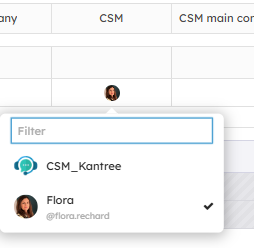
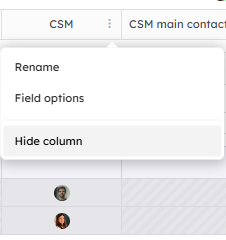
If you want to show/hide columns, click on the small caret in the column headers. You can also rename or delete the field from there. Delete the column is like delete the field from the card view, all the data asssociated with this field will be lost.
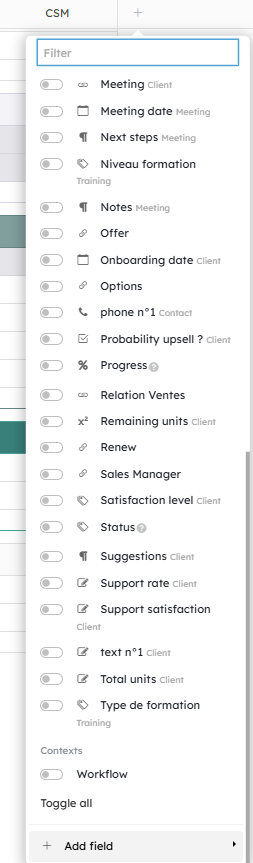
You can add new fields columns to your table, this new field will be available for all cards in the project.
Finally, you can drag and drop column headers to change the position of the columns in the table.
Planning tools
The planning tools help you handle dates in your cards.
You will find the timeline and the calendar.
Timeline
The Timeline let you edit dates field of your cards very easily.
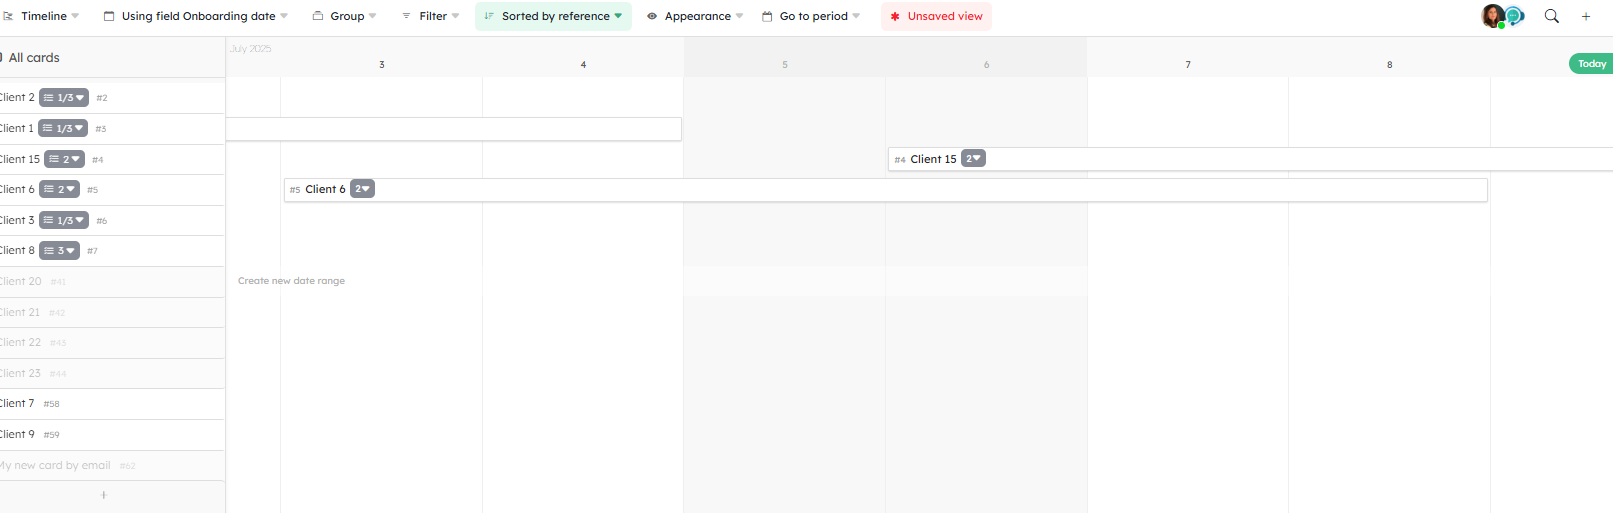
See [our guide](/help/guides/timeline) to know how to take the most of your timeline.
Calendar
The calendar view will present the cards in a calendar as you can find one in Outlook or Google calendar.
All dates and dateranges of all fields of your cards are displayed on the same calendar.
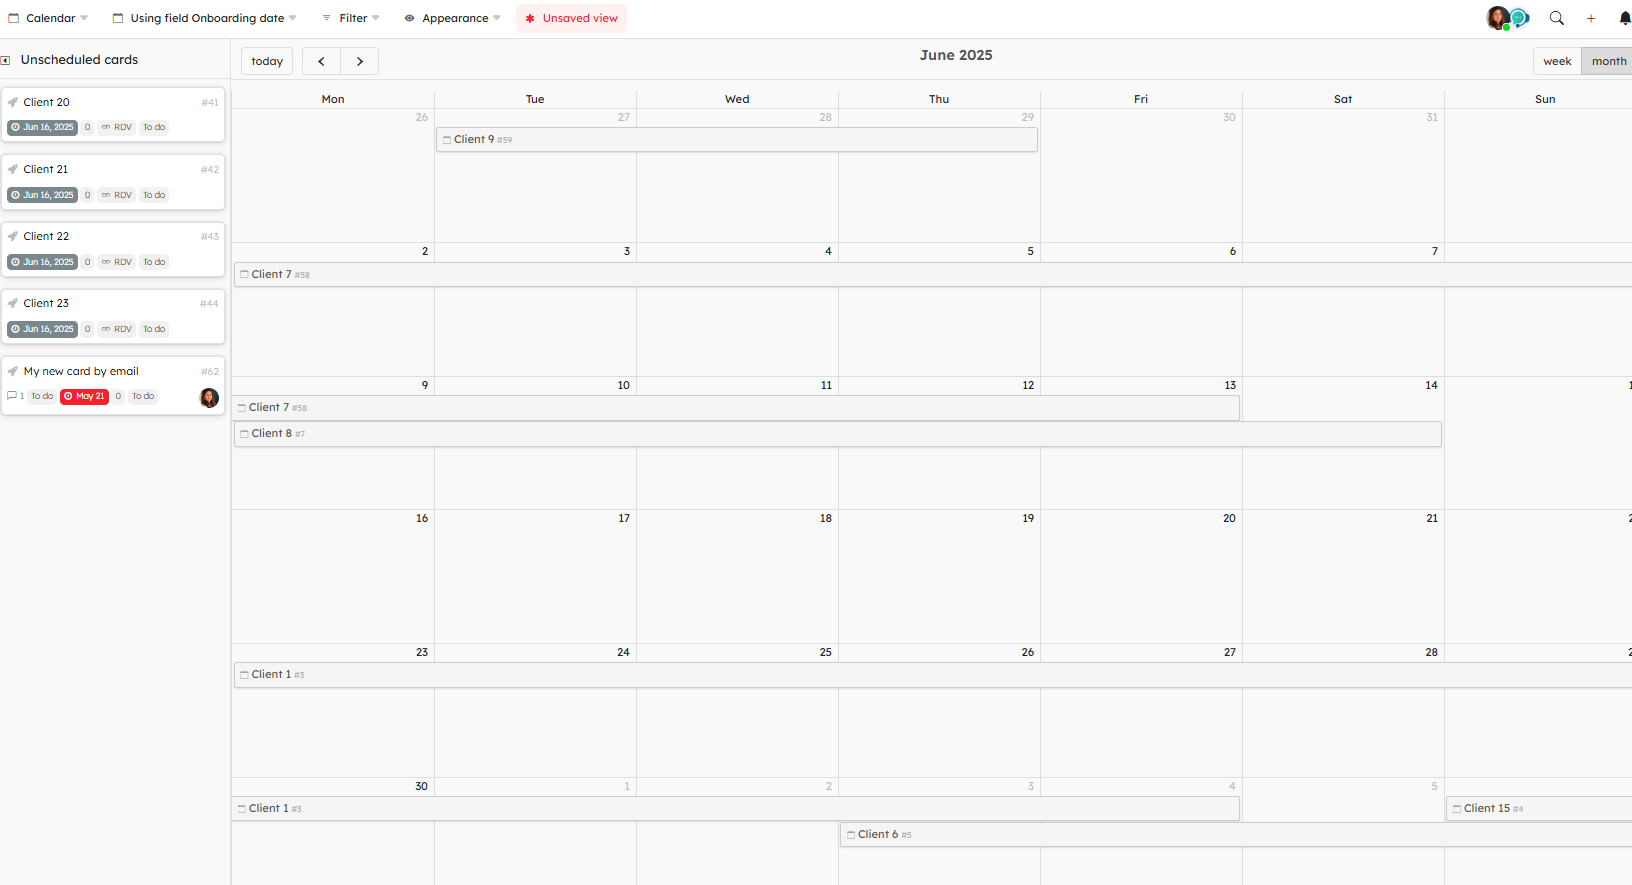
- The unscheduled panel, will gather all the cards without dates, in any of their fields. You can drag and drop this card to a day in the calendar to quickly set this date for its first date field (if the card has more than one, only the first will be set)
- Choose between week and month view
- You can drag cards in the calendar to change the dates
- get the iCalendar feed to add your project in your favorite Calendar tool like Outlook or Google calendar
You can also filter cards.
Activity Journal
The Journal lets you see all the activities that happened in your project. You can select a daterange, members, or type of activities to filter the journal and get exactly the information you need.
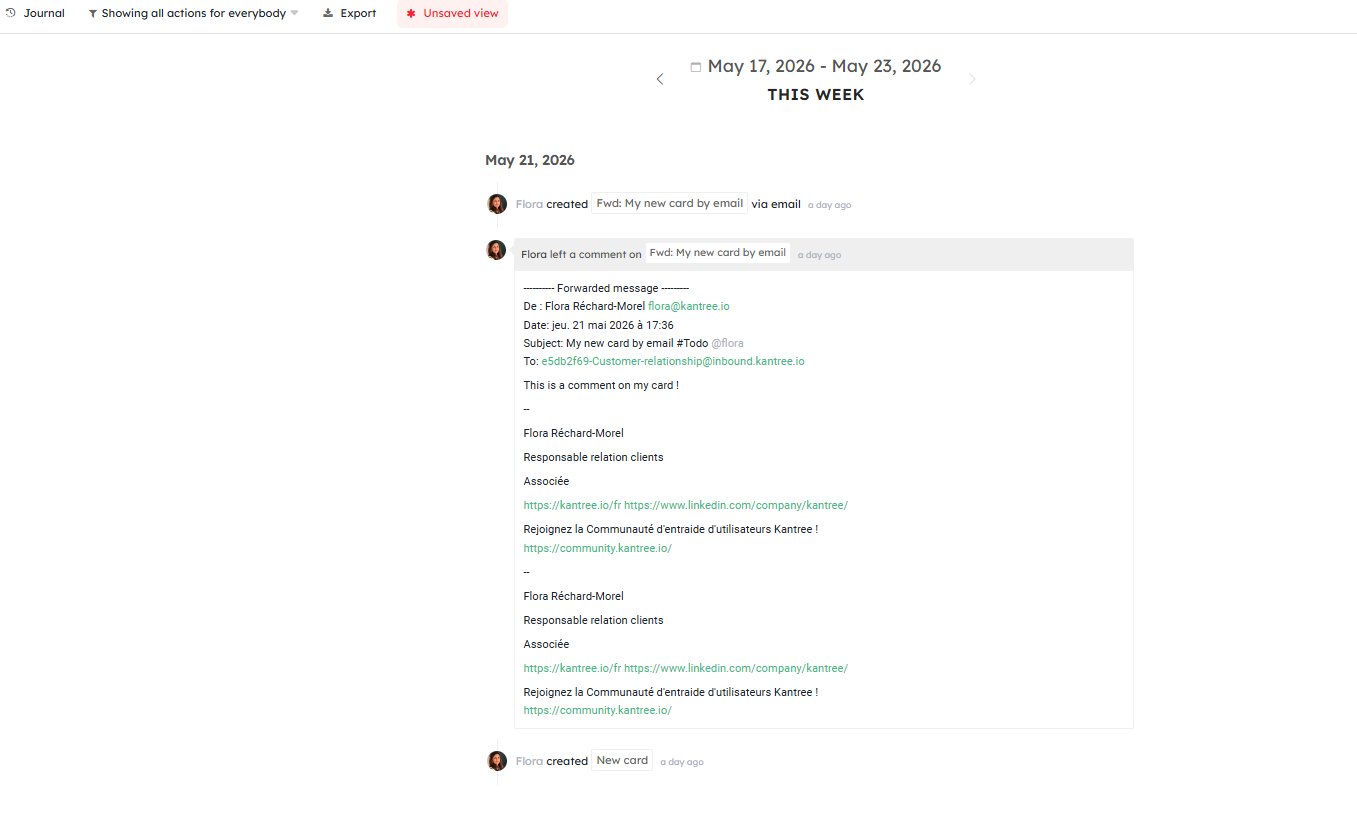
It is the perfect support to synchronize your daily work with your team mates.
You can export your Journal as CSV.
Logs overview
Log view gives you an overview of all the [logs attached to cards](/help/guides/logs), with possibility to filter by types of log and period.
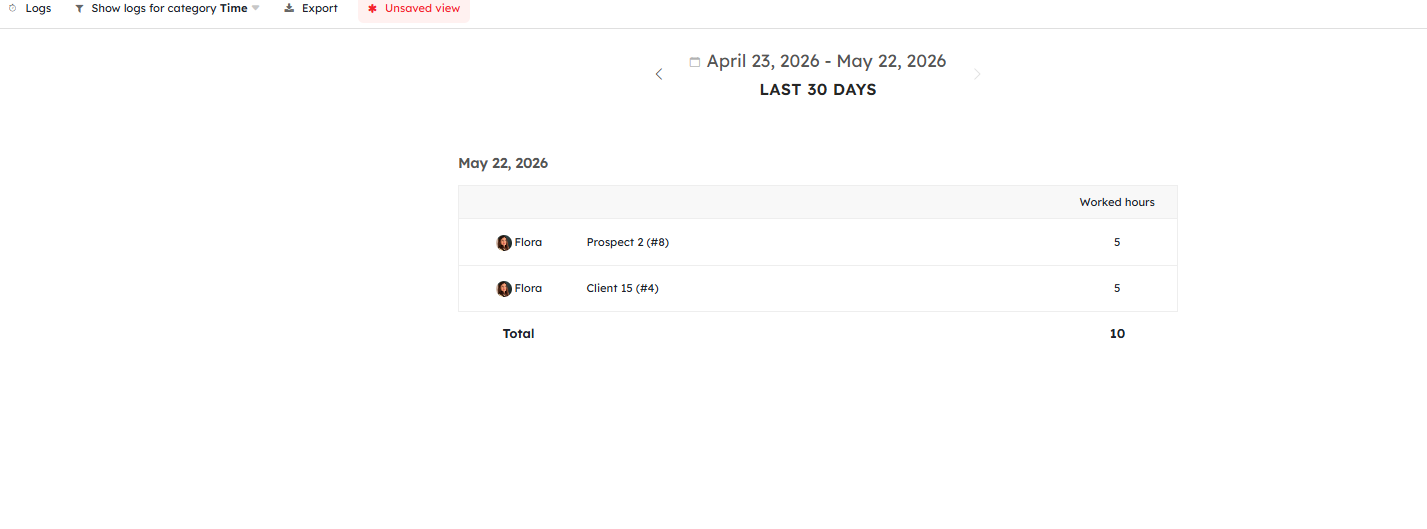
If you want to add a new type of log check [this guide](/help/guides/logs).
Manage Forms
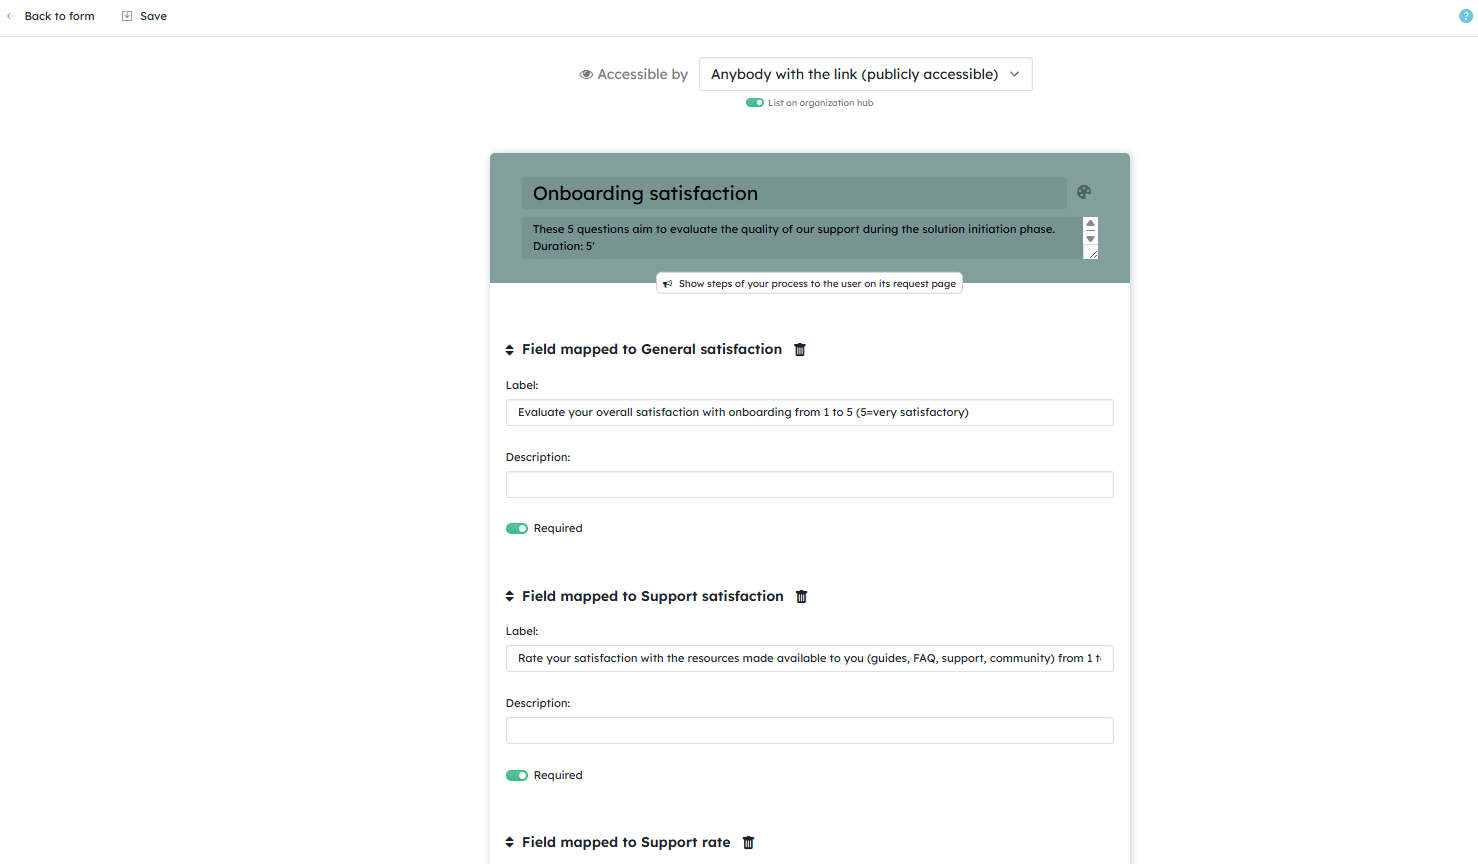
Using our form generator, you can provide simple public form to external people.
Each time a form is submitted, it will create a card in the group you specified, filled with the right fields.
Learn more in the [form guide](/help/guides/forms).
Export
You can export a project in a range of different formats.
Click on the project name, then on Export. A new window should have opened.
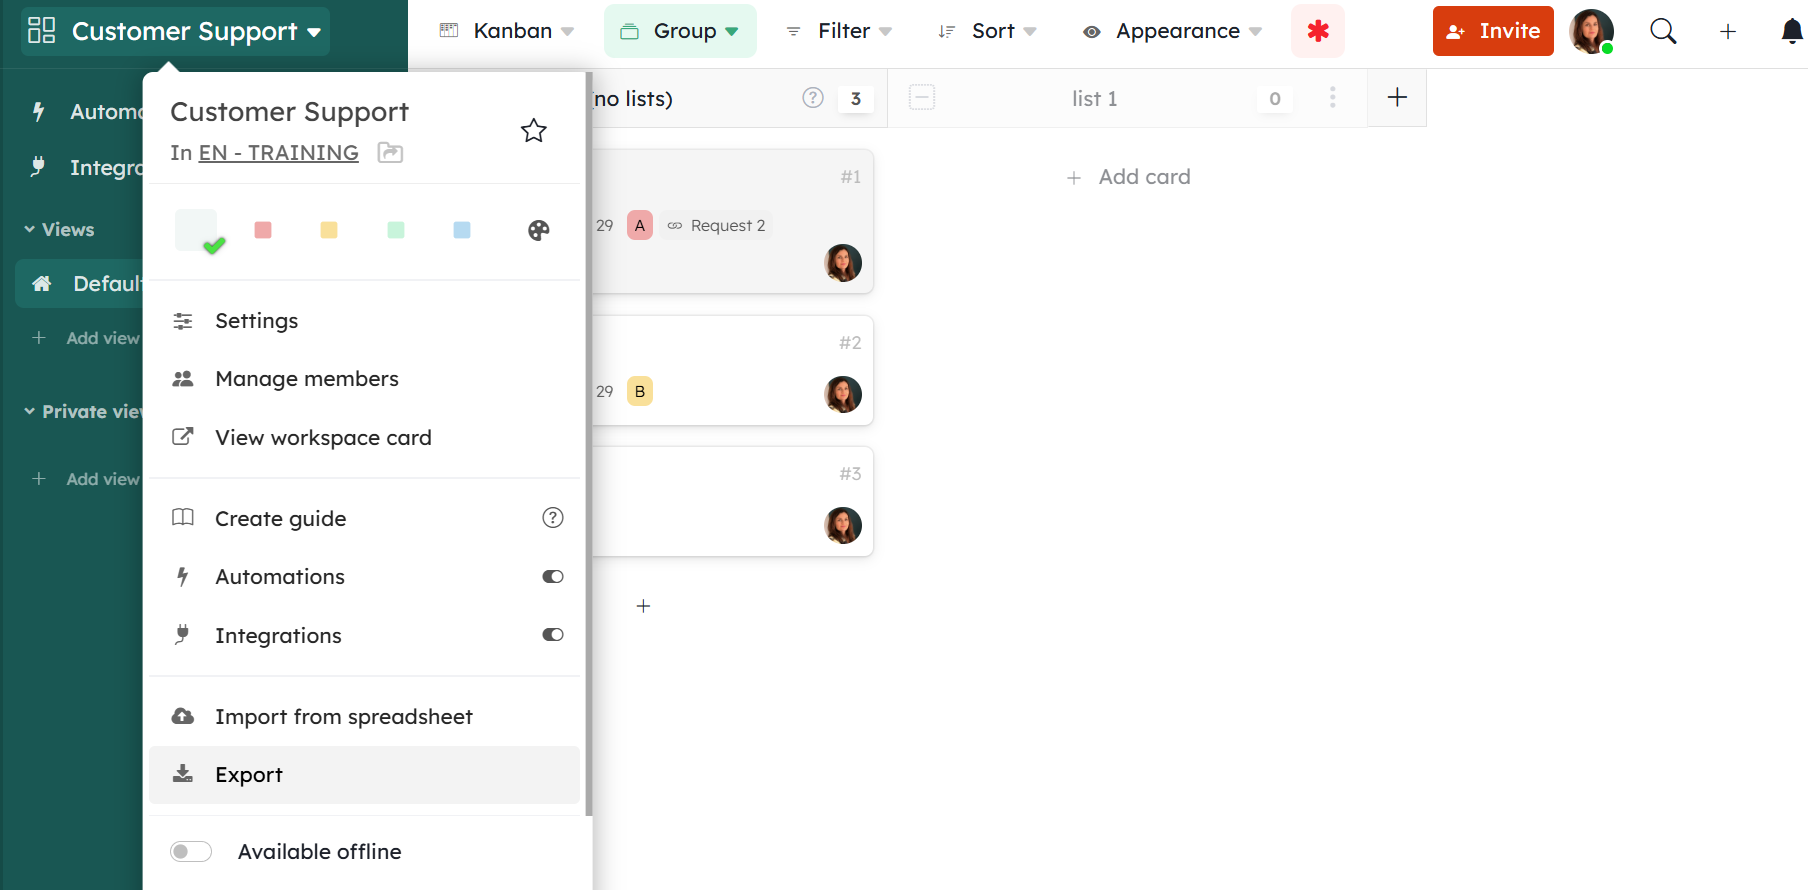
You can select a format (Excel, CSV, JSON, Tabular JSON) and which card fields and datas will be exported.
If you’re constantly repeating the same export, you can save an export template, and then select it when you want to export your project again.
You can also create an automatic rule with the “Export Workspace” action. See the Workflow automation guide.