Forms gives you a simple way to let external people create cards in your project.
Lets go into details.
Create a form
In your project, you will find a Forms tool.
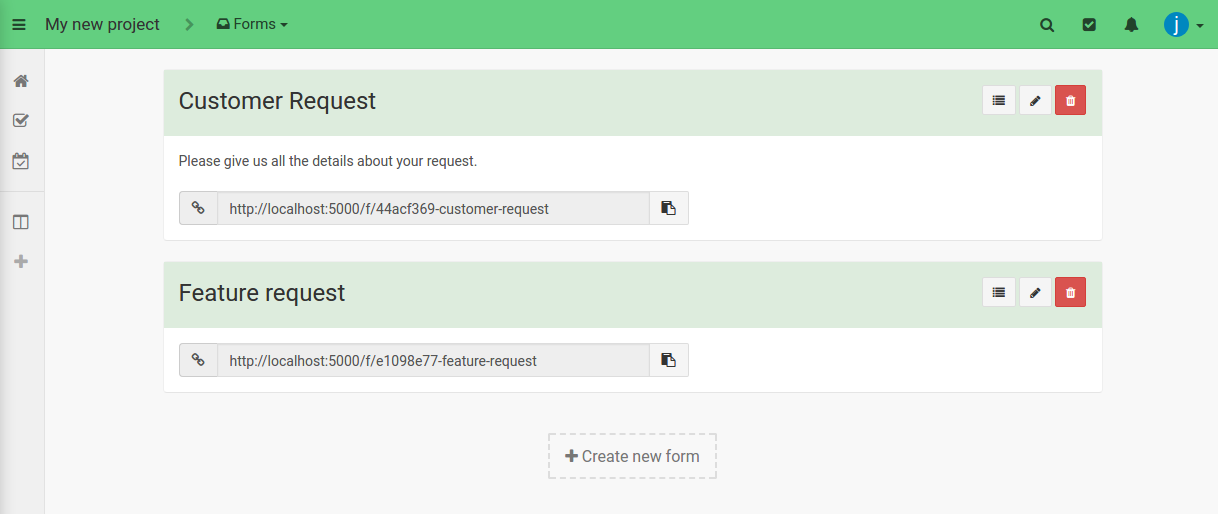
Click the Create new Form button, then you enter in the form editor.
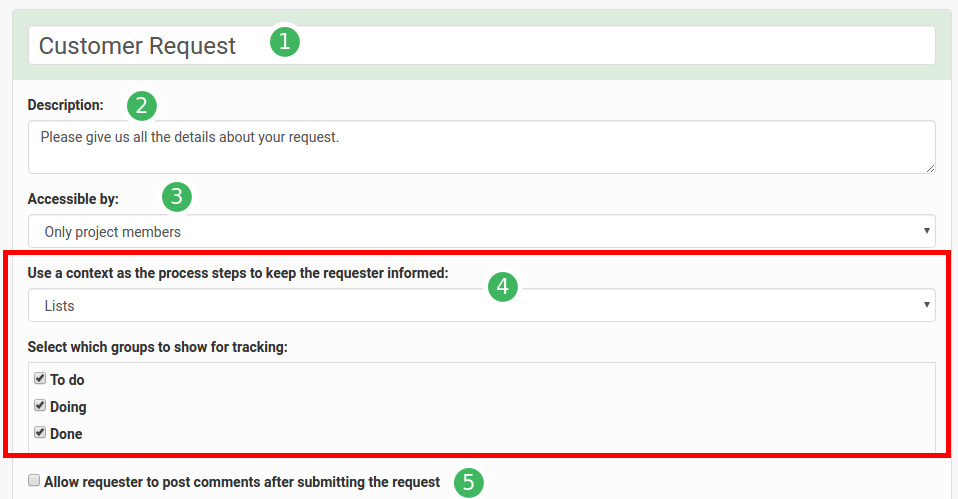
- Provide a name for your form
- Provide a description. This description will be displayed to requester before the form field
-
You can select the level of accessibility for your new form :
- publicly available
- to members of your team
- only to project members
- If you want to display to the submitter the current step in the processing of the request, you can choose a context of your project and which groups you want show to him. Once submitted, it will be displayed like this to the submitter:

- You can choose to allow submitters to comment its request. This will help you [interact with the submitters](/help/guides/forms#interact-with-submitters)
-
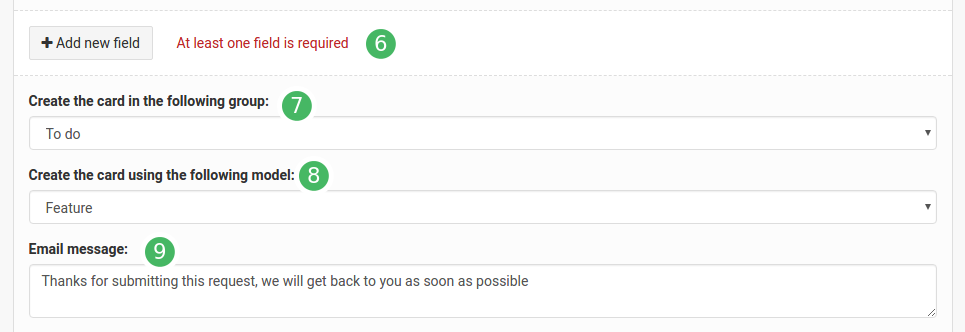
Add new fields in your form. These fields are mapped on the available [fields](/help/guides/customize-cards#card-fields-overview) in the cards of your project (and the [model](/help/guides/customize-cards#card-models) of the created card, see point 8). When you select a field, you can defined a label and a description that will appear in the form. You can tag a field as required for a submission.
 You can move fields easily by drag and dropping them with the
 crossed arrowsicon.If you are using card types, you will not see the fields linked to these types in the list of available fields.
To do this, activate the option to create a card based on a card type in “Advanced options once the form has been submitted”.
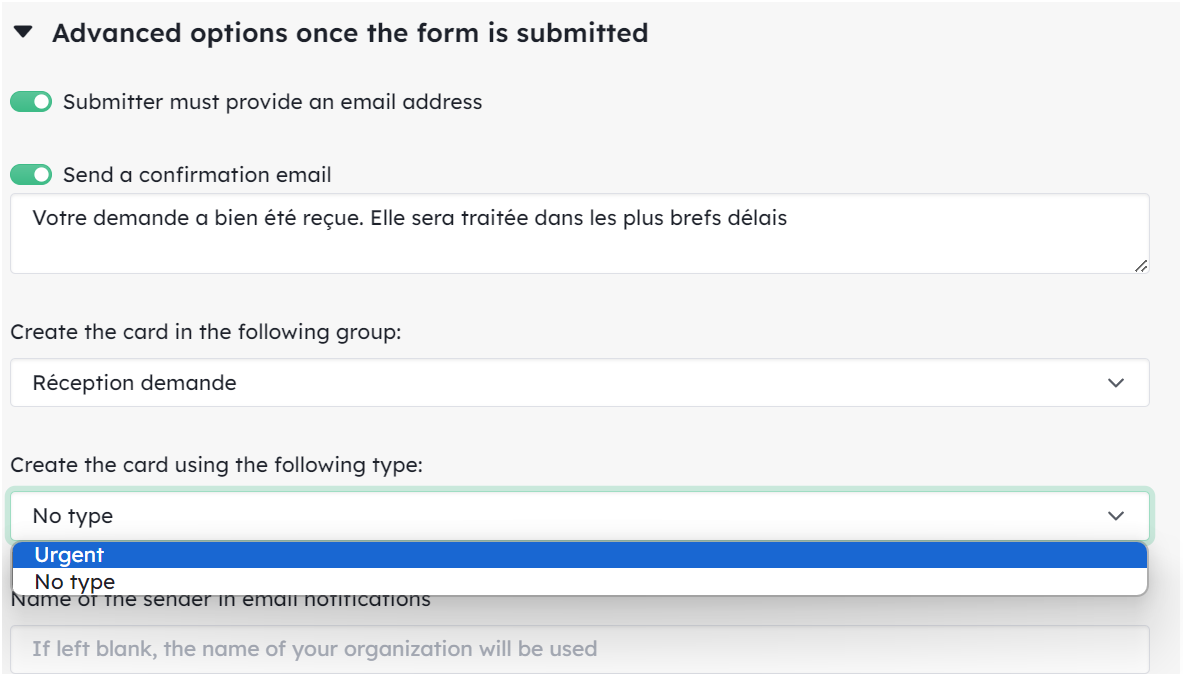
- Specify which group in your project, cards created by requests should land in. You can only select one.
- Select which [model](/help/guides/customize-cards#card-models), cards created by request should take. It will change the available [fields](/help/guides/customize-cards#card-fields-overview) for adding fields in your form.
- add some kind words in the email received by submitters (see below)
Submit a request
When someone submits a request, he receives this kind of email:
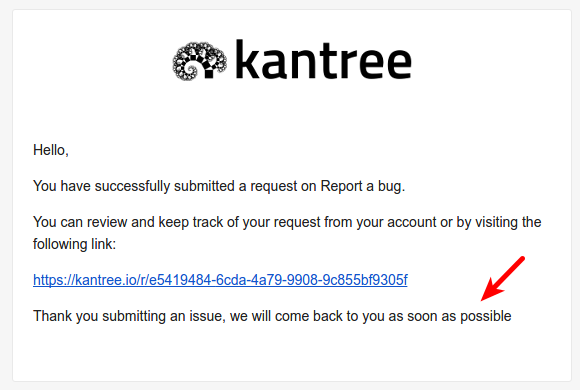
Pointed by the arrow is the custom message you have added in your form editor (see point 9 above).
The card is created in the specified group. It is tagged with a request icon.

If the requester doesn’t provide a title for the card (or if you didn’t add a title field in the form), the title is Request from and the name of the requester. If the form is public, the requester can be anonymous.
In the header of the card, you will find a link to the request (useful if the requester looses it and wants it back).

Interact with submitters
You can interact with the submitter using comments in your cards (and the right options enabled in your form, see above)
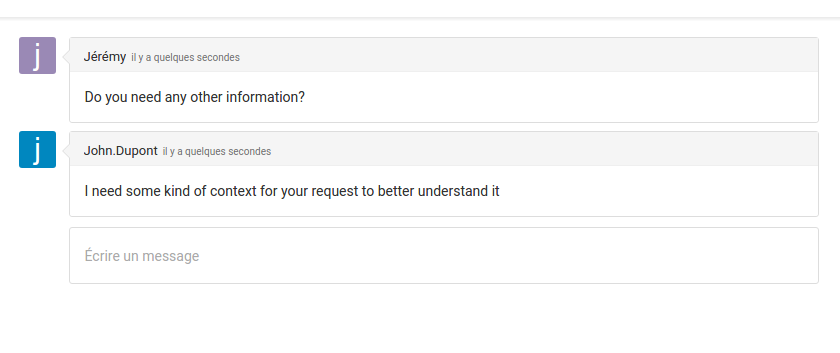
Post a comment on the card created by the request with the option Show in request enabled.

If you don’t, you can have private conversation about the request in your card without notifying the submitter.
Submitters don’t get email update or in-app notification if you edit values in cards created by their request, or if you move your card in groups.
Close a request
When you archive or delete a card created by a request, it closes the request.
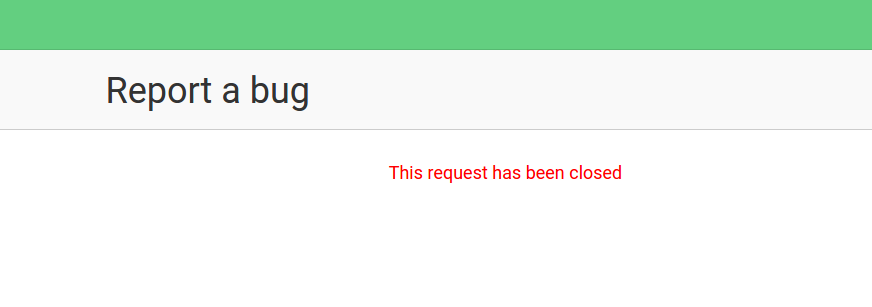
It is the only way to close a request.
Edit a form
You can edit your form anytime using the small pencil button.

Every submitter will see the changes in their already submitted requests, even if you add/remove field in your form.
You can enable/disable comments in the request, it won’t delete them in the existing comments. Only hiding them.
Delete a form
Delete a form by using the bin button.

Form won’t be accessible anymore, neither will the existing request page.
Card created by requests from this form will still exist but they will loose the request icon and you won’t be able to comment with the option show in request.